Exchange files with SEPAL#
Use SEPAL’s built-in tools and FTP solutions to exchange files
In this article, you can learn how to exchange files with SEPAL using:
built-in tools including Jupytyr Notebook, JupityrLab, RStudio and SEPAL file explorer
an FTP solution (specifically FileZilla®)
Built-in tools#
To exchange files with SEPAL, there are several built-in tools you can use.
Note
Since SEPAL’s built-in tools for uploading and downloading are limited, large amounts of data should be uploaded or downloaded using an FTP solution, such as FileZilla® (for more information, see FTP solution below).
Jupyter Notebook#
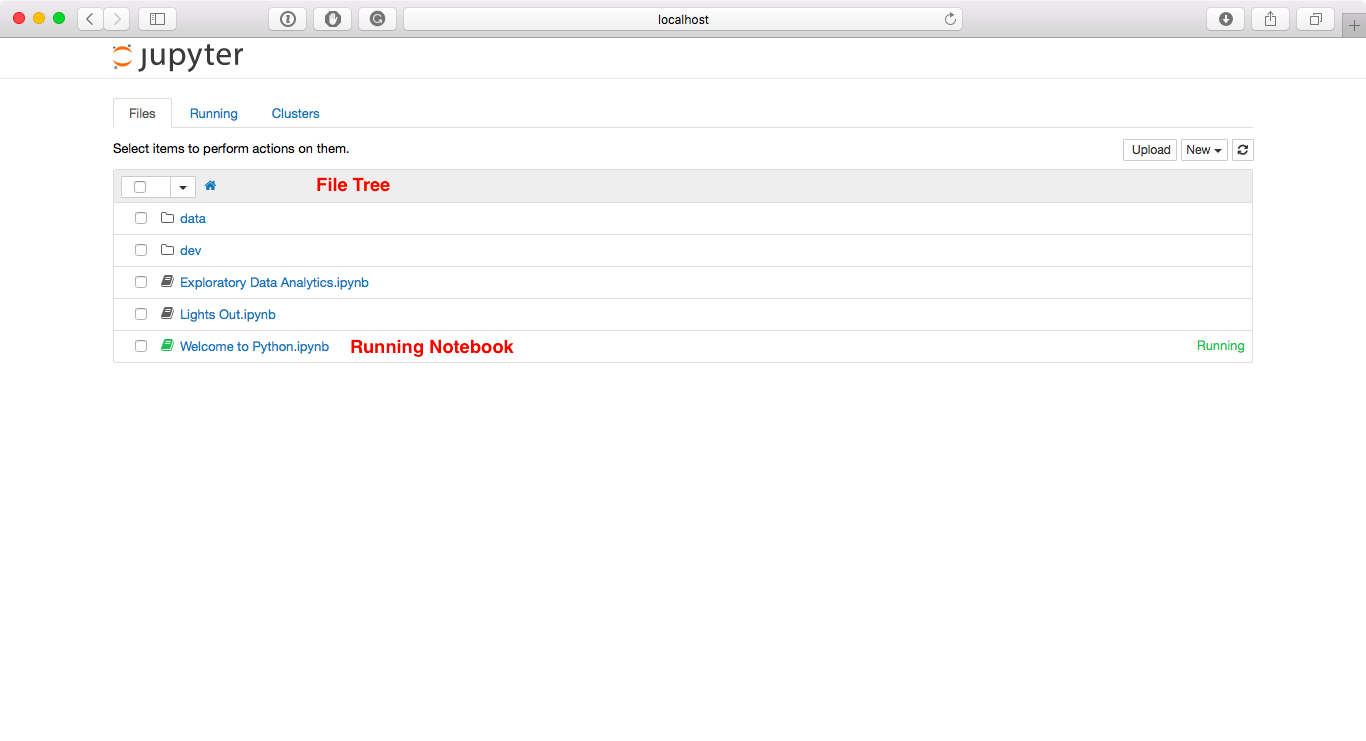
In the SEPAL Apps dashboard, open a new Jupyter Notebook app. The Notebook dashboard enables you to access files and directories on your system, which can be opened, created, deleted, renamed, downloaded, copied and shared.
Select Upload to upload a file from your computer to the platform.
Select Download to download a selected file to your computer.
Note
Download is only available when you select a single file (note: folders cannot be downloaded).
Jupyterlab#
In the SEPAL interface Dashboard, open a new JupyterLab app.
Use the File browser and File menu to access files and directories on your system, which can be opened, created, deleted, renamed, downloaded, copied and shared.
Upload files to the File browser directory by dragging and dropping, or by selecting Upload files at the top of the File browser:
Any file in JupyterLab can be downloaded by right-clicking its name in the File browser and selecting Download from the context menu:
See also
For more information about the JupyterLab interface, see Jupyterlab documentation.
RStudio#
In the SEPAL interface Dashboard, open a new RStudio app.
Use the File menu (in red in the yellow image below) to access files and directories on your system, which can be opened, created, deleted, renamed and copied.
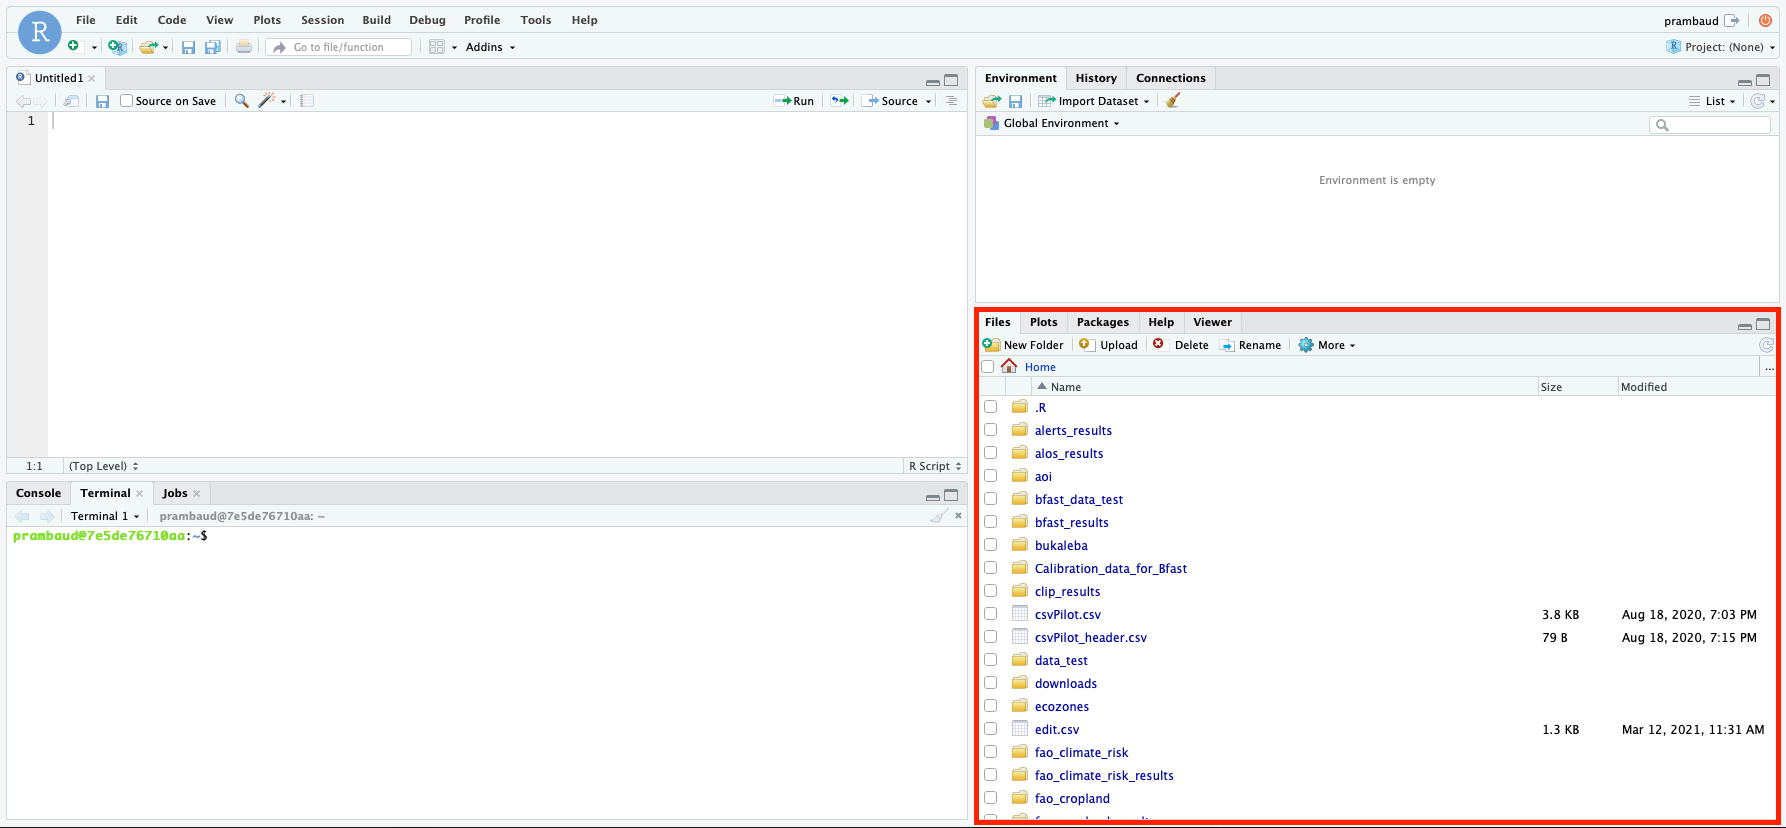
Upload files from your computer by selecting Upload in the upper left of the red rectangle.
SEPAL file explorer#
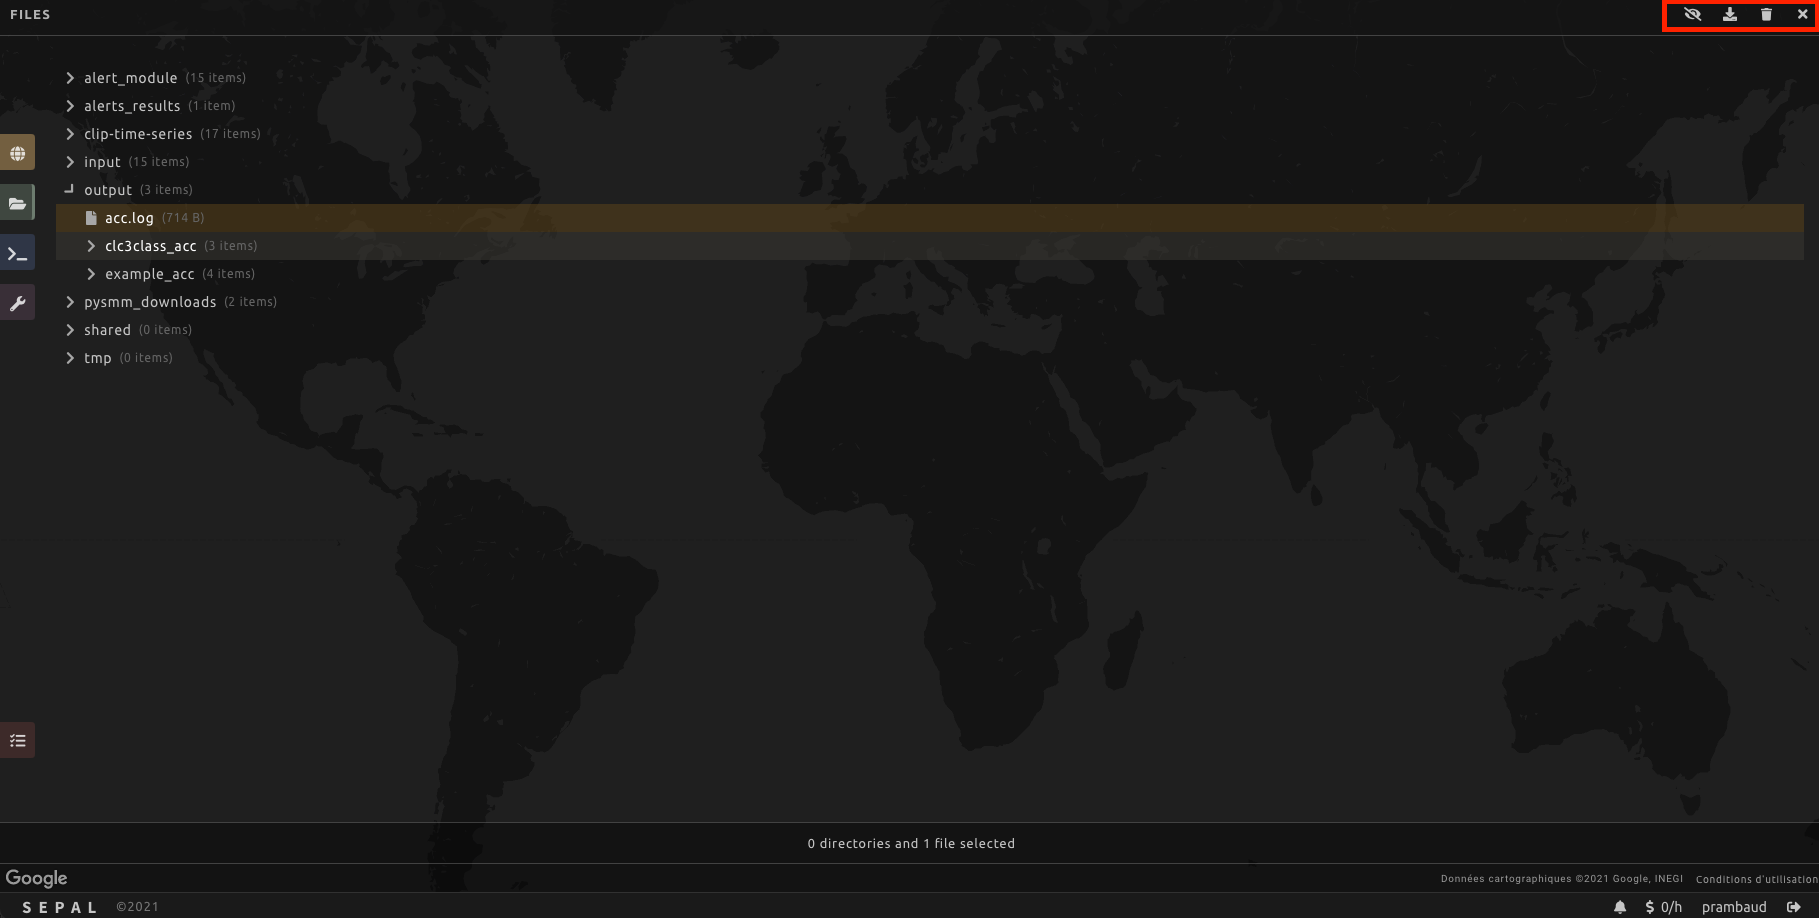
In the SEPAL File explorer, youcan access files and directories on your system, which can be deleted and downloaded.
After selecting a single file, select Download to download the file to your local folder.
Note
You cannot download multiple files or folders directly through this interface.
FTP solution#
SEPAL content can also be accessed via a Secure Shell (SSH) File Transfer Protocol (FTP).
Attention
You must request user resources in order for any FTP solution to connect to SEPAL (see Manage your resources).
If you don’t know what an FTP solution is and/or don’t have an FTP solution installed on your computer, you can learn more by reading this section, where FileZilla® is used as an example.
See also
An FTP client is software that allows you to connect to an FTP server in order to exchange files. Once connected, you can upload, download, copy or delete files on either the remote computer or your local computer.
FileZilla®#
FileZilla® is a free, open-source FTP solution distributed free of charge under the terms of the GNU General Public License.
The FileZilla® client not only supports FTP, but also FTP over Transport Layer Security (TLS) – FTPS – and Secure File Transfer Protocol (SFTP), both used in SEPAL.
Tip
To download the software, go to https://FileZilla-project.org/download.php?type=client.
Connect your FTP client to SEPAL#
Accessing files in SEPAL is easy using FileZilla®.
To use FileZilla®, open the application and connect to the SEPAL server by selecting Menu > File > Site Manager > New Site. Use the following as a guide for filling out the form.
Host: ssh.sepal.io
Port: 443
Protocol: SFTP–SSH File Transfer Protocol
Logon Type: Normal
User: <your SEPAL username>
Password: <your SEPAL password>
Note
For User and Password, enter the credentials you use to connect to the platform.
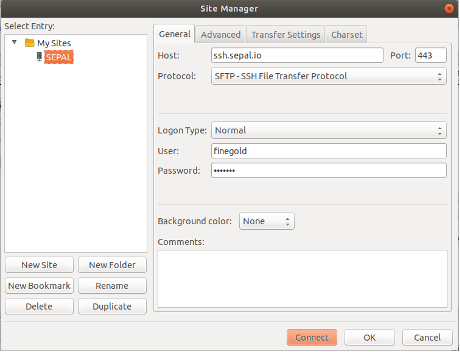
By selecting Connect, your SEPAL drive will appear in the right pane.
In the left pane, you can find files and folders on your computer.
Use the FTP client to interact with SEPAL#
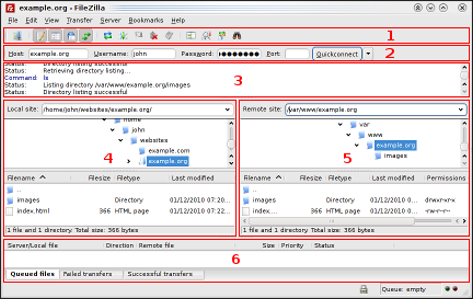
Familiarize yourself with FileZilla®’s window layout by following this overview.
Below the Toolbar (1) and Quick connect bar (2), the Message log (3) displays messages related to transfers and connection. Below, you can find the file listings.
The left column (Local pane, 4) displays the local files and directories (e.g. content on the PC you’re using FileZilla® on).
The right column (Remote pane, 5) displays the files and directories on the server you are connected to.
Both columns have a directory tree at the top and a detailed listing of the currently selected directory’s contents at the bottom.
You can easily navigate either of the trees and lists by clicking around, like you would in any other file manager.
In the lower section of the window, the Transfer queue (6) lists the status of to-be-tranferred or already transferred files.
See also
For more information on using FileZilla®, see their wiki page.
