

Use GEE with SEPAL#
Sign up for a GEE account and connect with SEPAL
In this article, learn how to:
set up your GEE account
connect your GEE account and SEPAL account
upload files to GEE
use GEE assets in SEPAL
Introduction#
SEPAL is closely linked to Google Earth Engine (GEE), a Google-powered Earth-observation cloud-computing platform.
SEPAL can:
access data stored in the GEE data catalog;
use GEE for processing large datasets; and
read and write data to GEE assets.
A large part of SEPAL’s existing code is based on the JavaScript GEE application programming interface (API).
All SEPAL recipes are based on GEE and run scripts written by SEPAL team members to enable access to state-of-the-art processing algorithms without having to write code.
In the SEPAL Apps list, the applications tagged with the Google logo () are also running with the Python GEE API and don’t require you to use big instances to run complex operations.
SEPAL recipes can be run from the main SEPAL interface using default SEPAL credentials or your personal GEE access credentials; however, to run the SEPAL applications that employ GEE, you will need to link your SEPAL and GEE accounts. SEPAL applications that make use of GEE will not run (i.e. authentication will not work) if your GEE and SEPAL accounts are unlinked.
Set up your GEE account#
Sign up#
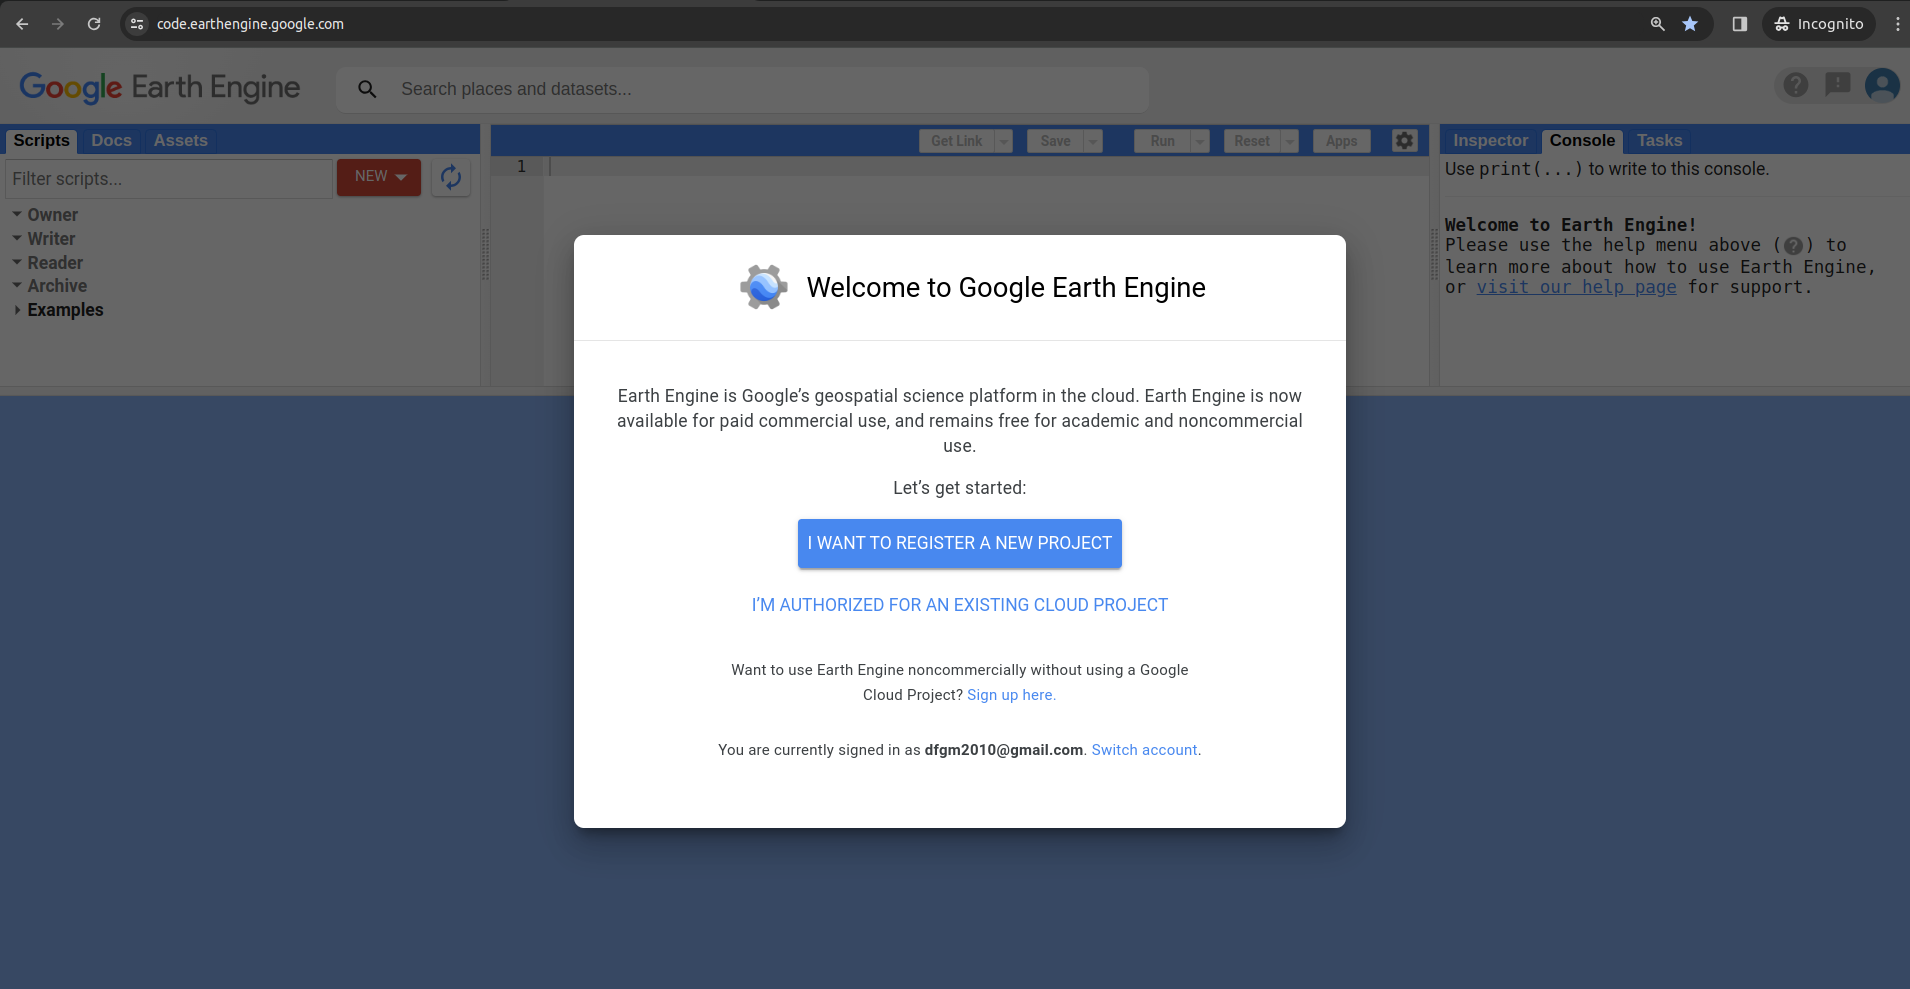
A GEE account is required to properly export images and data products as GEE assets or SEPAL applications using GEE from the SEPAL interface. A Google account is required to sign up for GEE.
To sign up for a Google account, go to https://code.earthengine.google.com and select I want to register a new project.
Create a Google Cloud project#
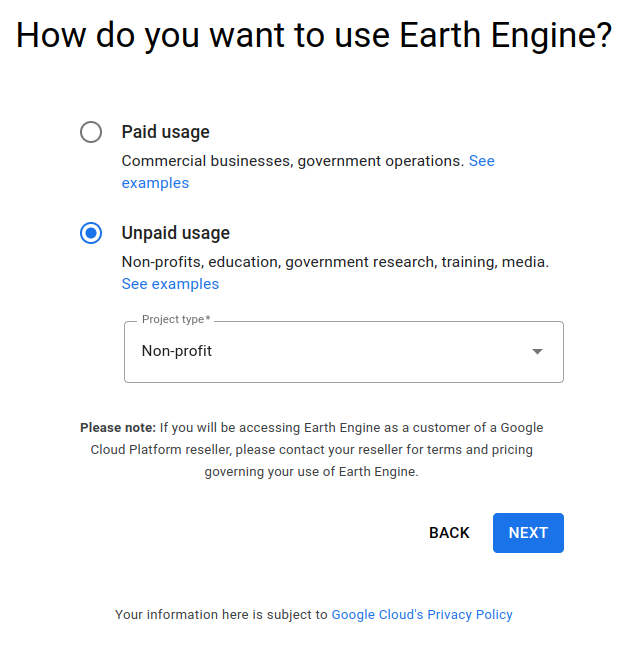
GEE now requires connecting to a Google Cloud project (GCP), available for paid commercial use or free for academic and research purposes.
Select Register a Noncomercial or Commercial Cloud project and follow the instructions to create your account.

Select Unpaid usage and choose your project type (e.g. Academia & Research, Government, Non-profit). Select Next.
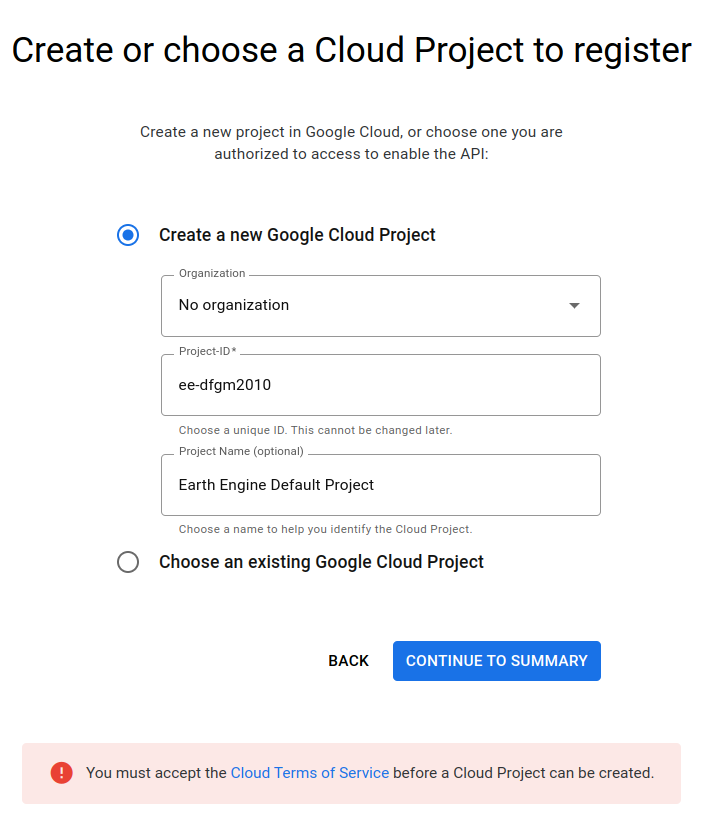
Create or choose an existing GCP to register your project, then select a Project-id and optionally a Project name. Select Continue to summary.
A red alert will appear at the bottom of the page, requesting that you accept the Cloud Terms of Service to continue. Select the link.
You will be redirected to the Google Cloud page, where you will see a welcome form. Read and accept the Terms of Service (1) and optionally (2) check the box for Email updates. Select Agree and continue (3).

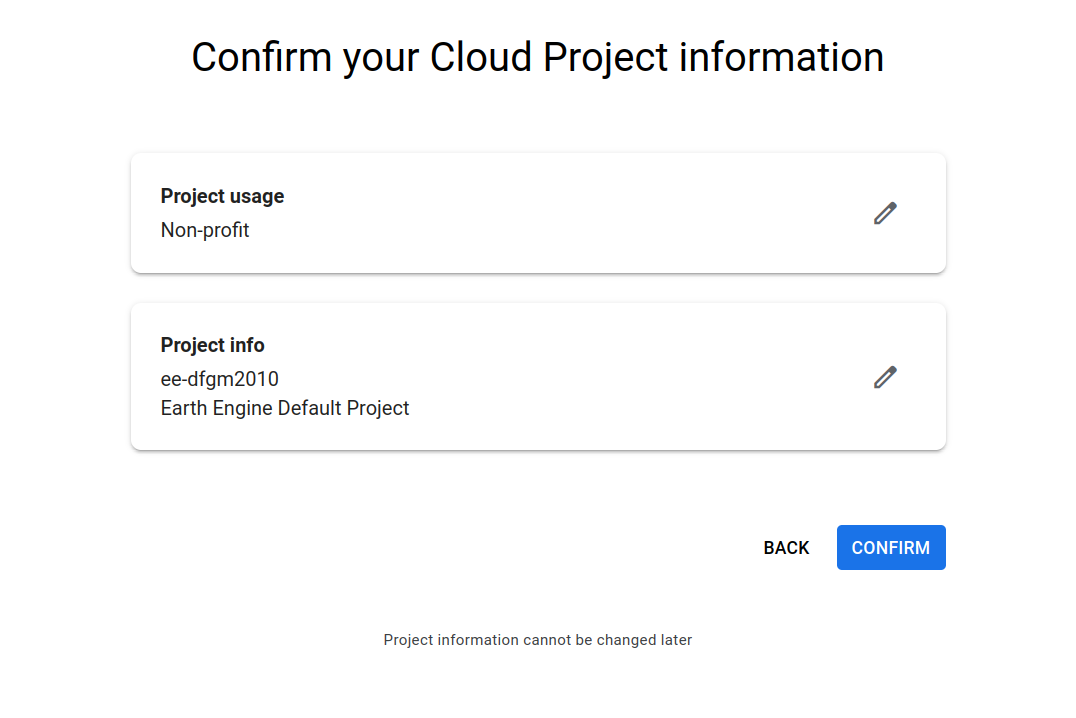
Finally, review the summary of your project and select Confirm. Your project is now registered and you can start using GEE.
Tip
If you experience trouble while linking your Google account to GEE, ask the Google Group community for support.
Initialize the Home folder#
To use your GEE account in the SEPAL interface, set up the Home folder, where all your Assets (i.e. Vectors, Rasters, Collections, Mosaics and Classifications) will be exported. Failing to set up this folder will prevent you from successfully executing export requests.
To set up the Home folder, go to the Earth Engine Code Editor.
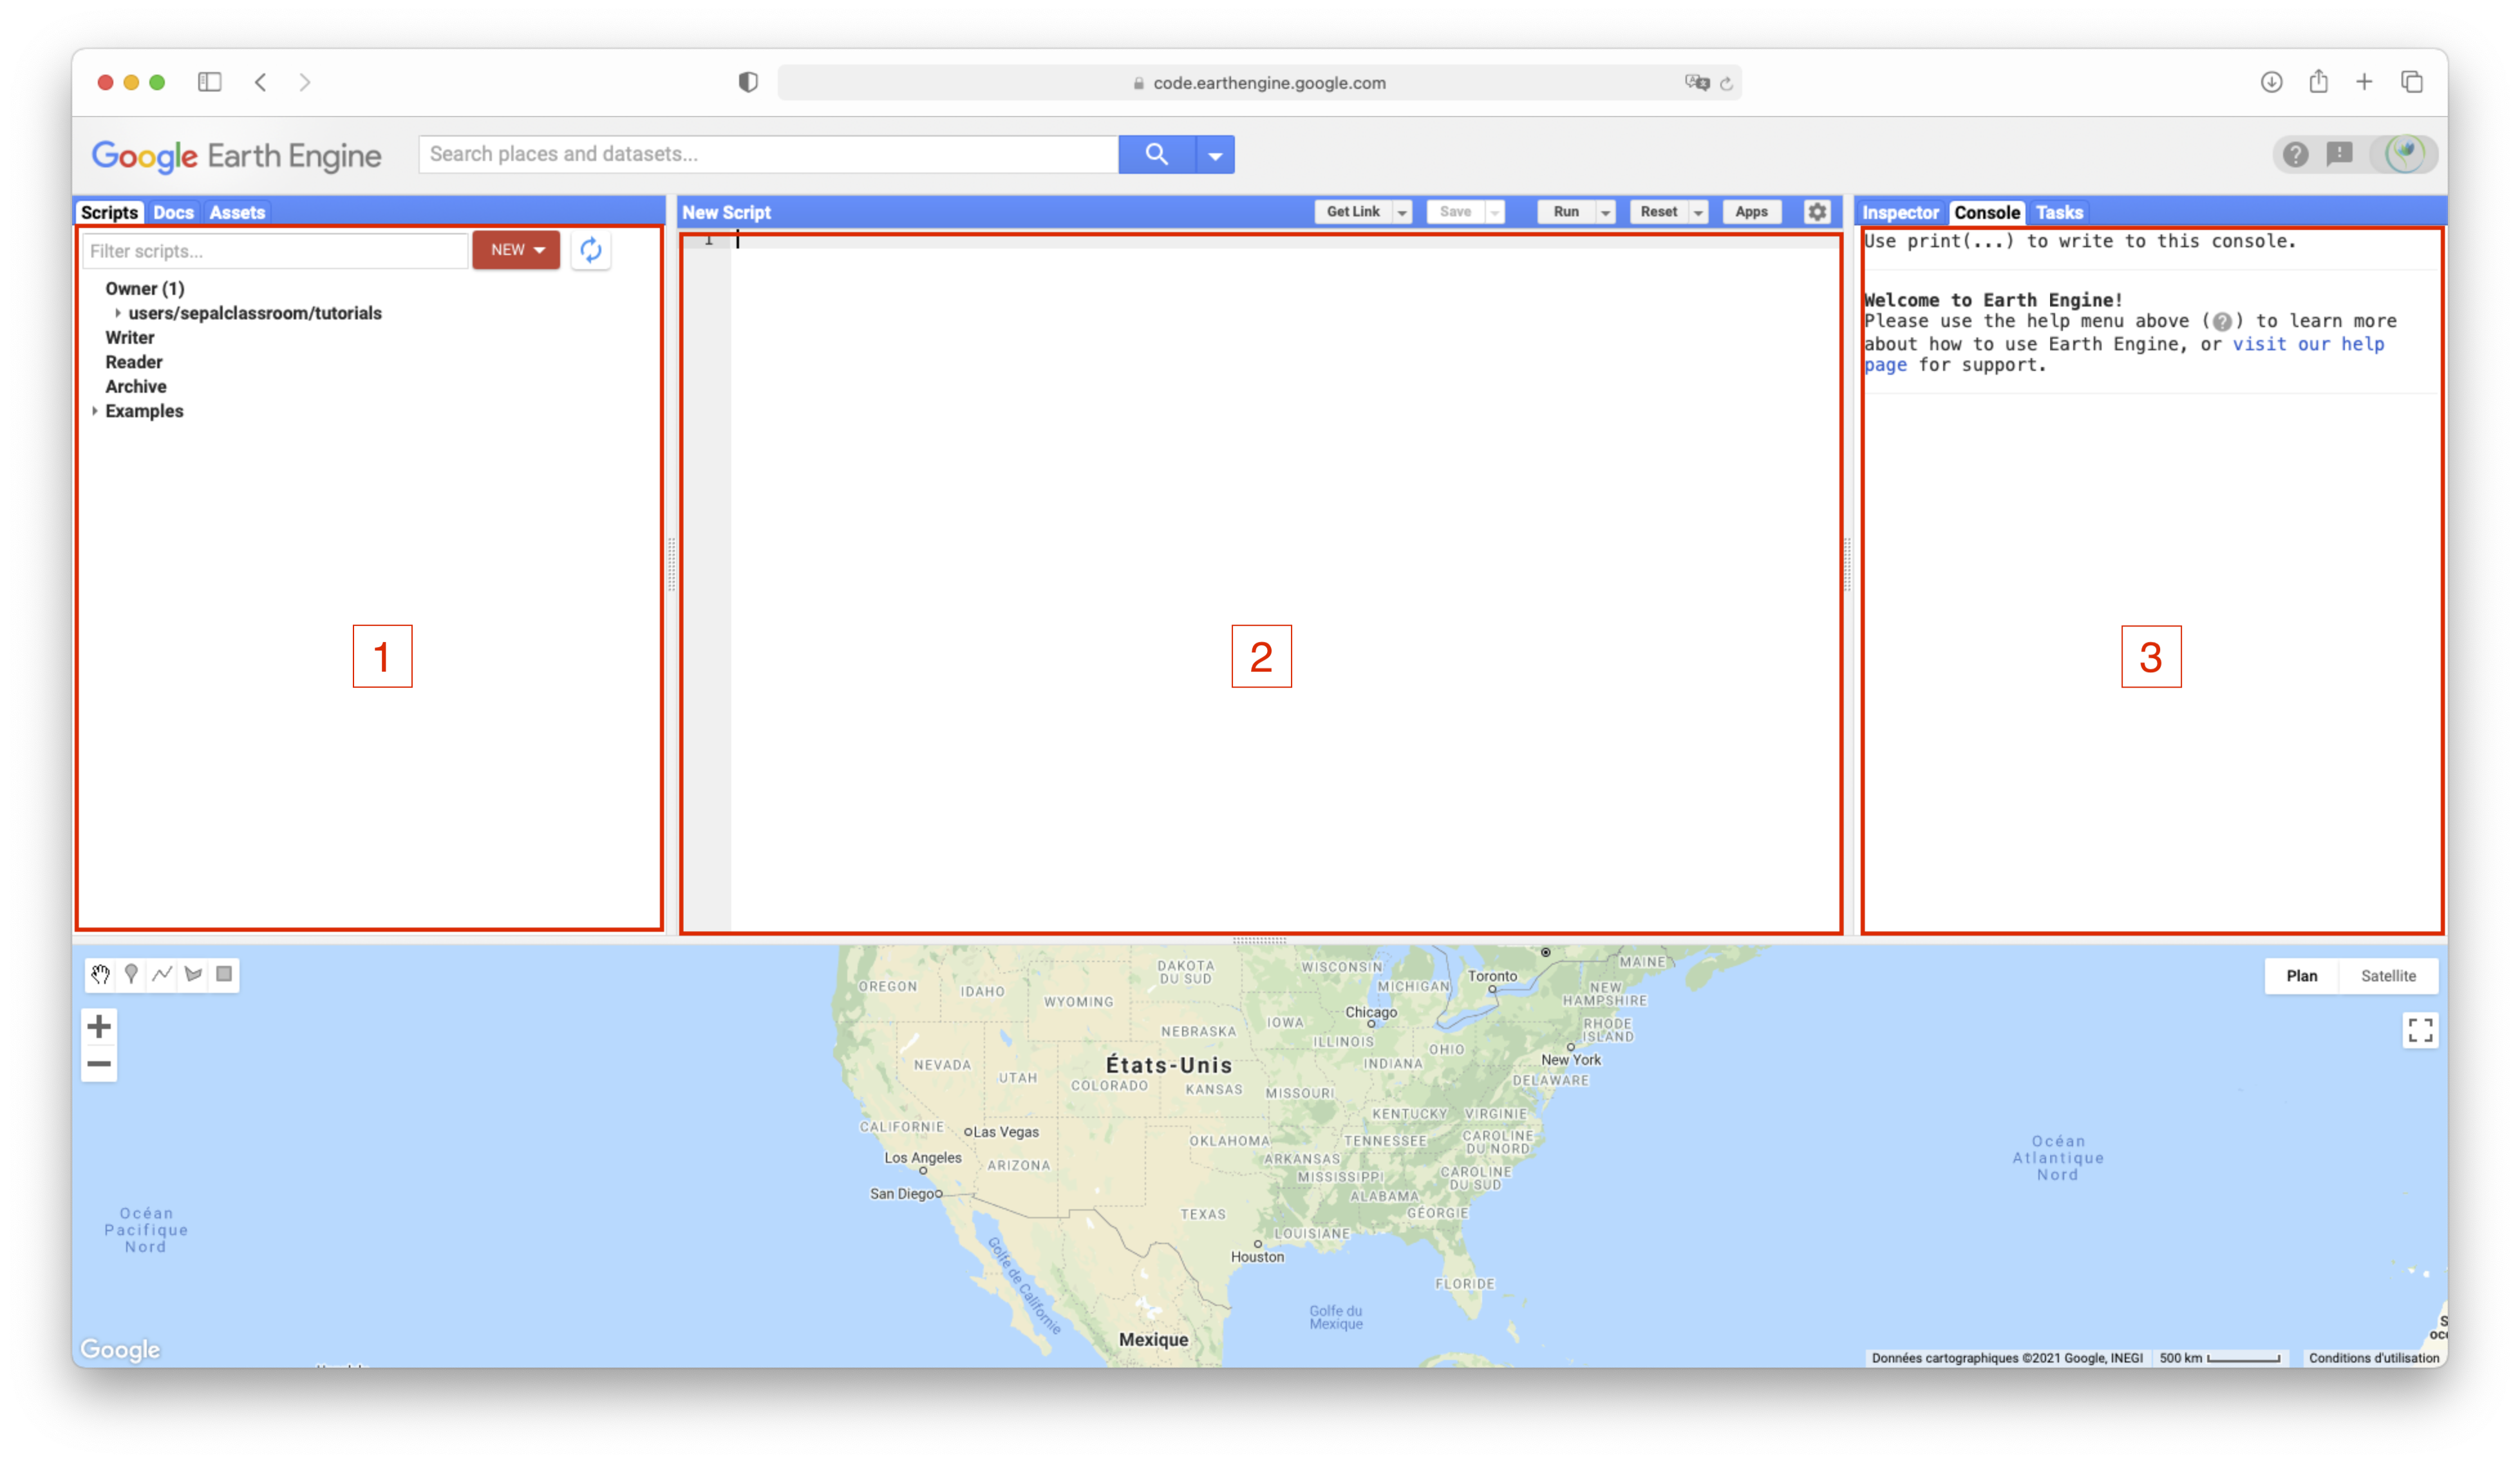
The page is subdivided into three zones and a map:
Zone 1: Provides you with access to your GEE account information, subdivided into three panes:
Assets: Displays all assets in your account.
Scripts: Displays all scripts available with your account (shared and written).
Doc: Displays documentation of the GEE JavaScript API (GEE JS API), if you need to code in this editor.
Zone 2: Allows advanced users to code their own scripts using the GEE JS API.
Zone 3: Displays information about current processes, divided into three panes:
Inspector: Transforms the arrow of the mouse into a pointer, allowing you to click anywhere on the map to view information about what you are displaying.
Tasks: Displays all of the tasks of your account, as well as their statuses (i.e. Running, Finished or Failed).
Console: Displays the Console pane of running scripts.
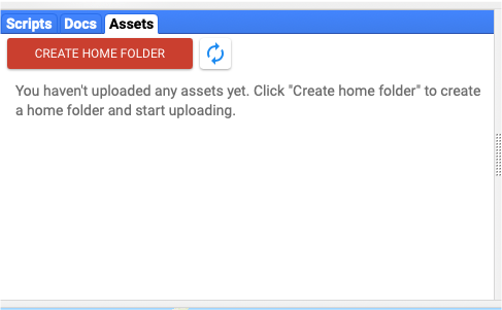
Go to Zone 1 > Select Assets > Select Create home folder.
Select the name of the folder (this can only be set once and never changed; if you’re not satisfied with the suggested name, you can create your own as long as there are no spaces or special characters).
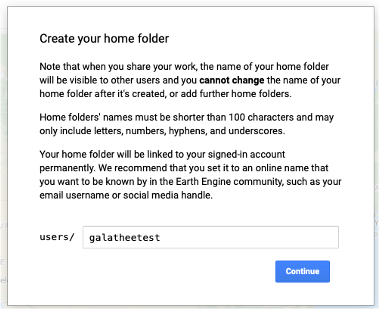
When you return to your list of Assets (located in the Zone 1 pane), you should see the name you provided as the first folder at the root of the Asset tree.
In our example, we used galatheetest:

Note
After initializing your GEE account, start the connection process between GEE and SEPAL.
Connect GEE and SEPAL#
SEPAL can work without being connected to your GEE account, but you will miss numerous opportunities to leverage the platform’s potential.
In this subsection, we present the connection procedure between GEE and SEPAL.
Connection#
Go to sepal.io and sign in.
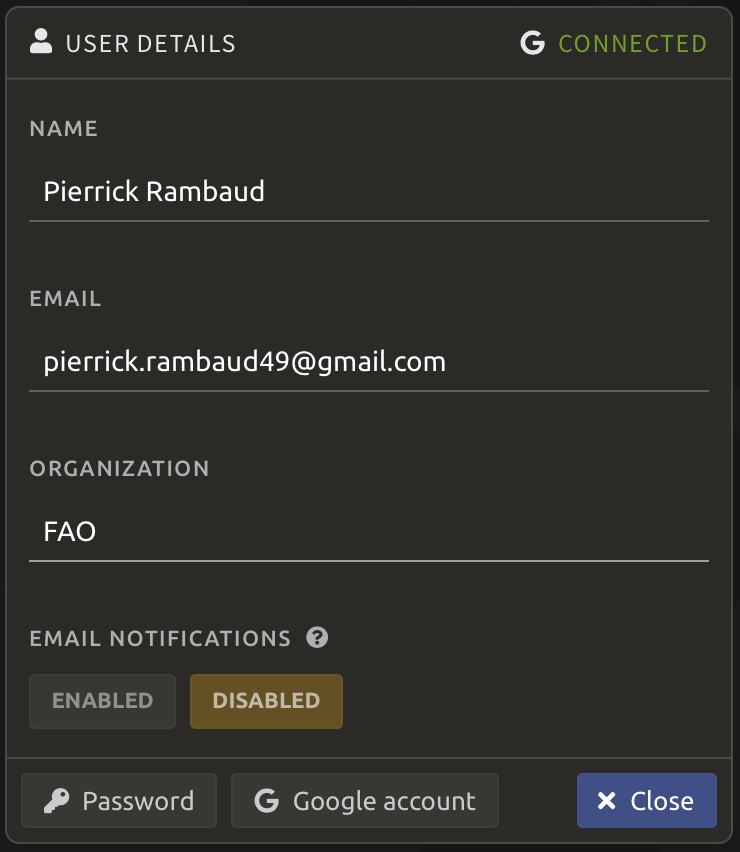
Select your Username in the lower-right side of the window (e.g. prambaud in red in the image below).

Next to the Google logo () in the upper-right corner of the User details pop-up window, the status of the connection between your GEE and SEPAL accounts is displayed (if you have not connected your accounts, it will read Disconnected).
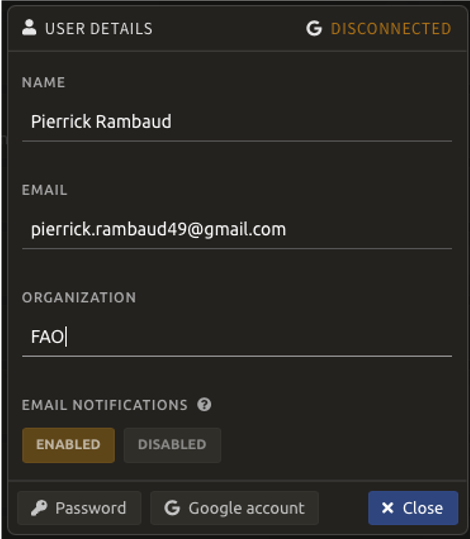
Select Google account in the lower section of the pop-up window (if your GEE account is disconnected, you will see text that reminds you what functionalities are unavailable without a custom GEE account).
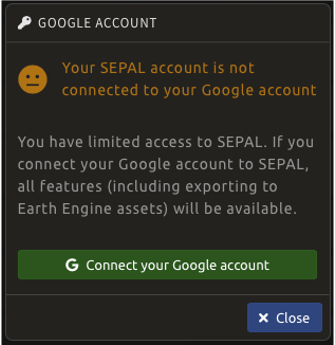
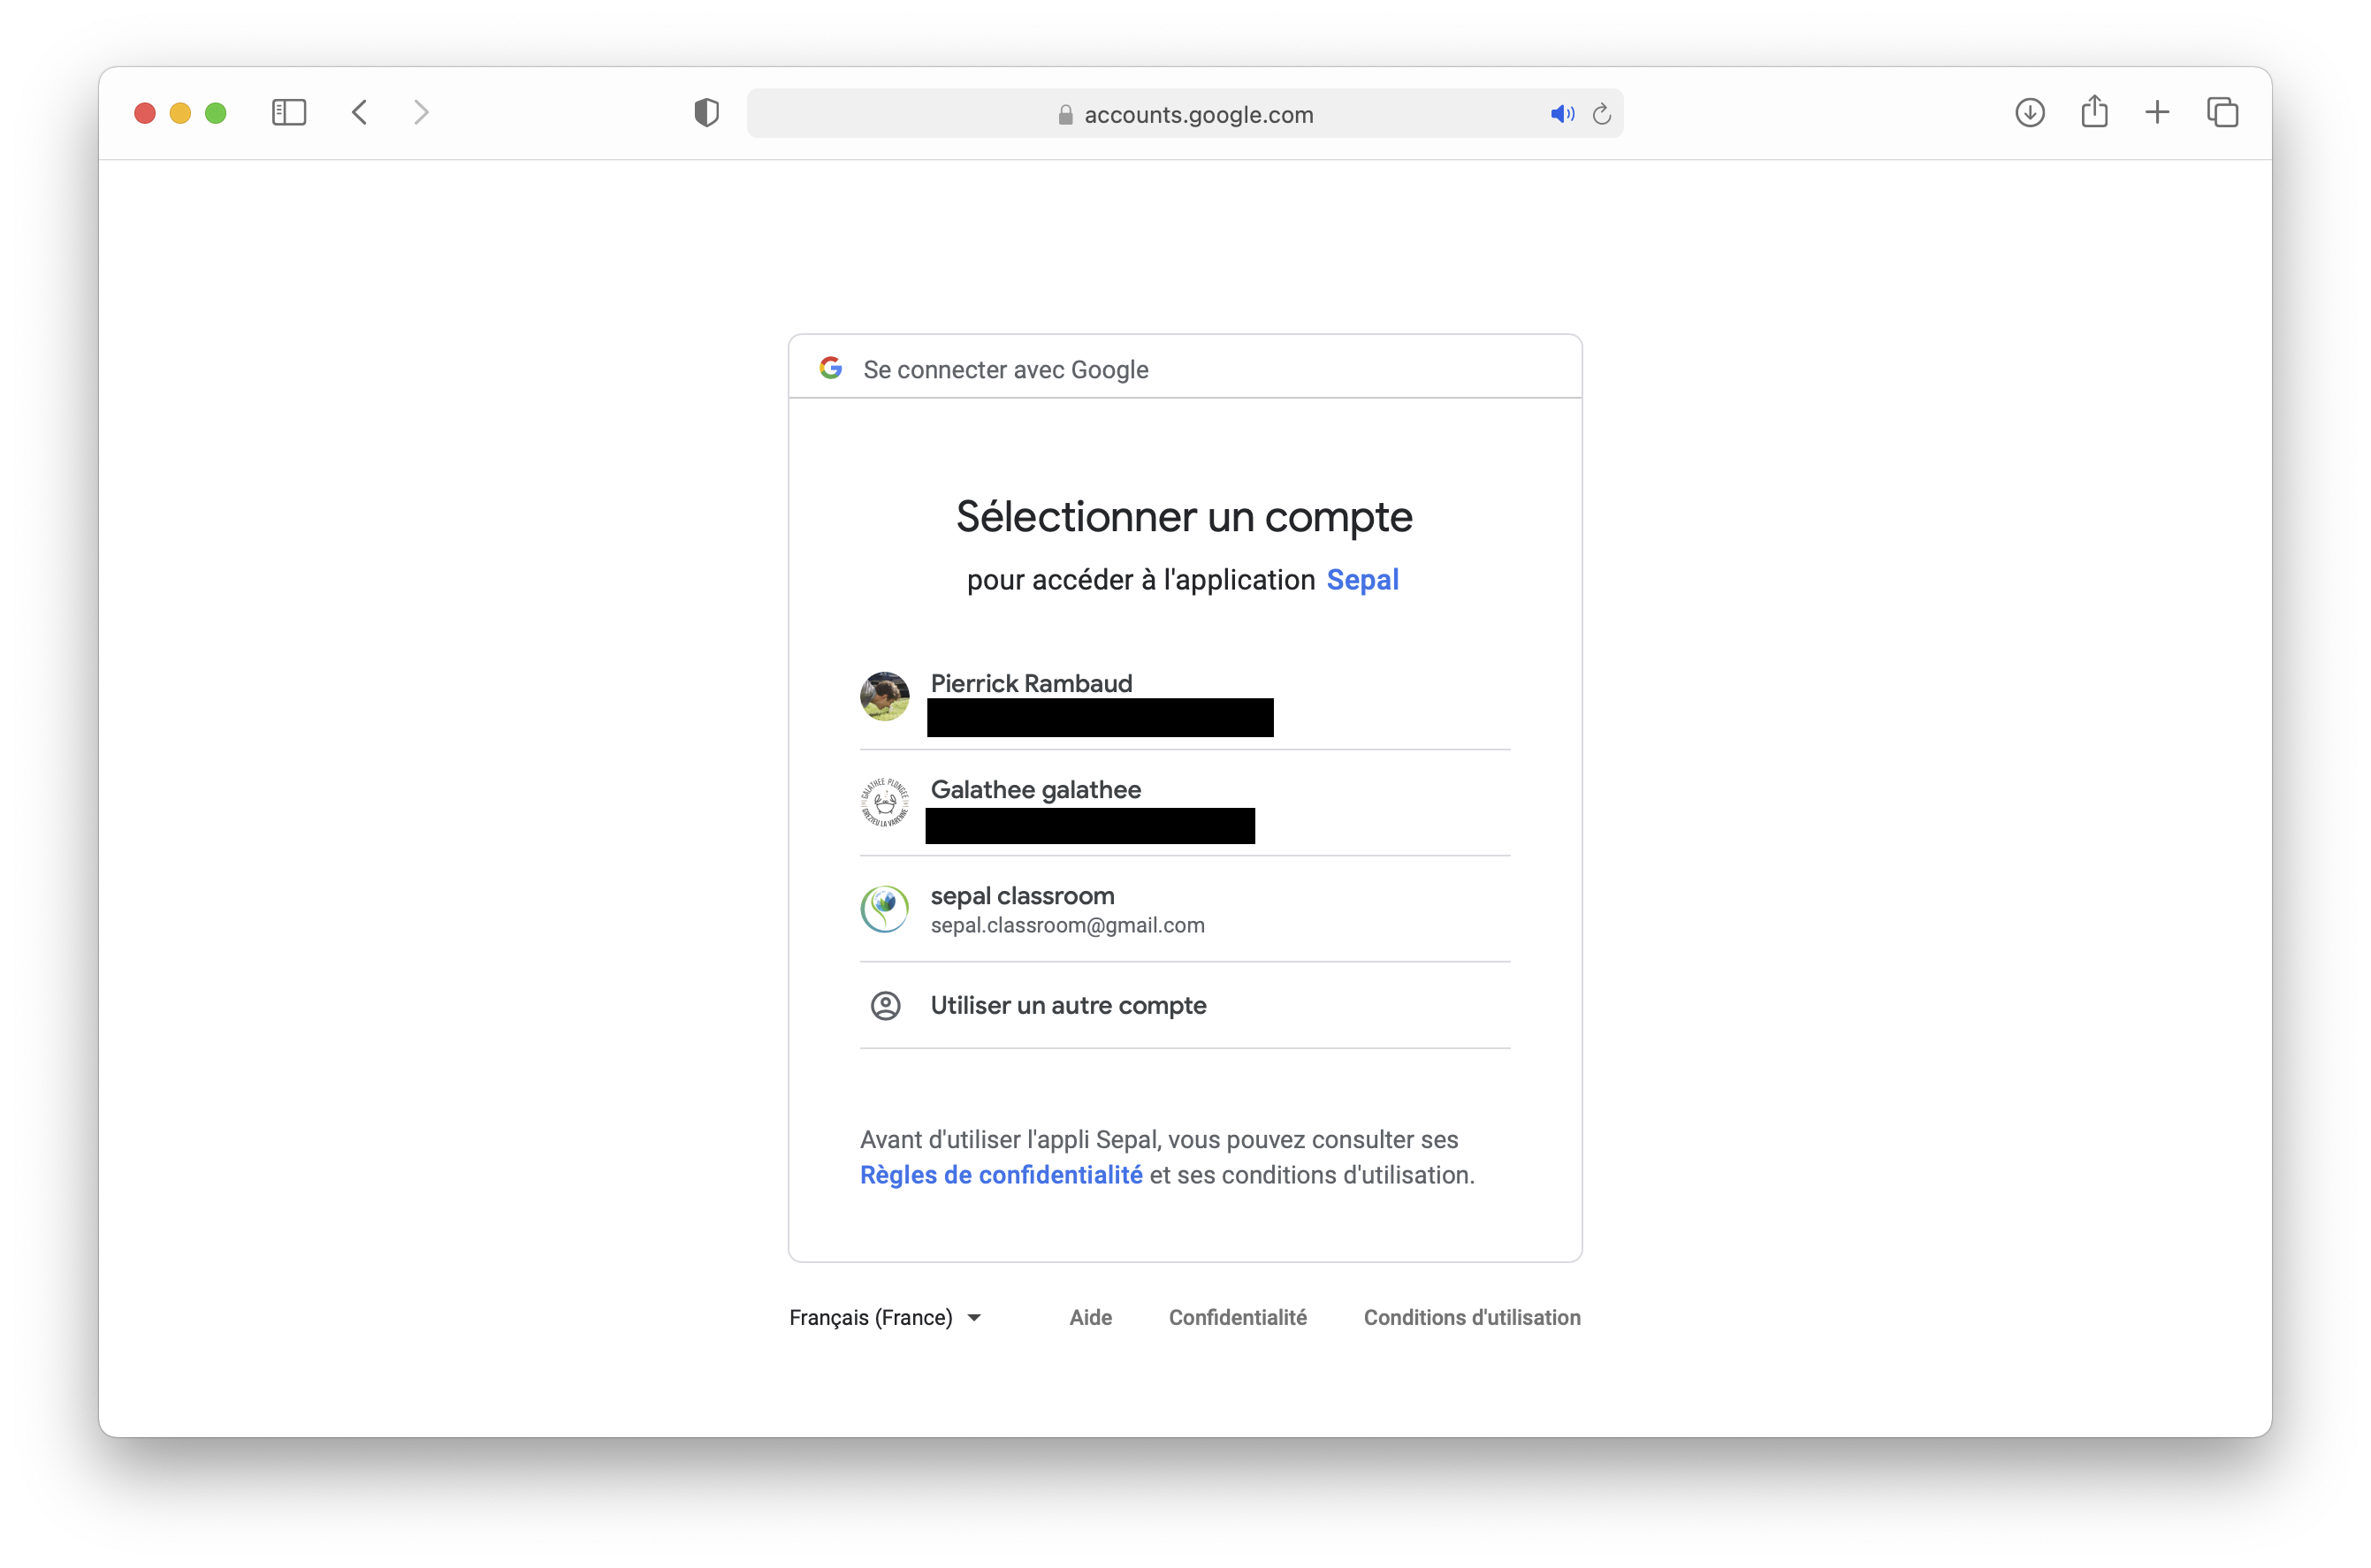
Select Connect your Google account in the pop-up window that appears. Choose the account associated with GEE in the list.
Note
You will see a message requesting your permission to authorize SEPAL’s access to your Google Drive, as well as your Assets folder and Home folder to export recipes and module results.
Once the connection process is complete, you will be redirected to the SEPAL website, where you can select the Google Cloud project you want to use with SEPAL (check Create a Google Cloud project). Select Apply.
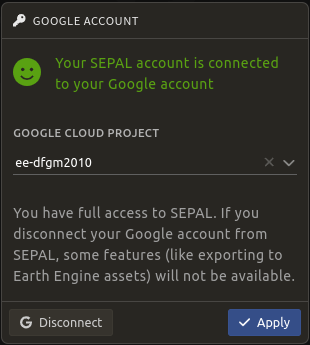
Open User details again. The pop-up window should display Connected in green in the upper-right corner.
Disconnection#
If you want to change accounts or disconnect your GEE and SEPAL accounts:
Open User details and select Google account. You should see the following window:

Select Disconnect your Google account.
Upload files to GEE#
When you use SEPAL recipes and modules, you’ll be asked to use GEE assets to provide rasters (ee.Image) or vectors (ee.FeatureCollection) to the core GEE-based algorithm.
These assets can be either:
public assets that someone shared with you; or
assets that you created yourself and would like to use.
Tip
For vector files, SEPAL provides an interface to upload them from your computer to the platform and eventually to GEE. This process allows you to deal with the full process directly from SEPAL without going to the Earth Engine Code Editor (for more information, see Vector file manager).
Go to Assets in the Zone 1 pane in the Earth Engine Code Editor.
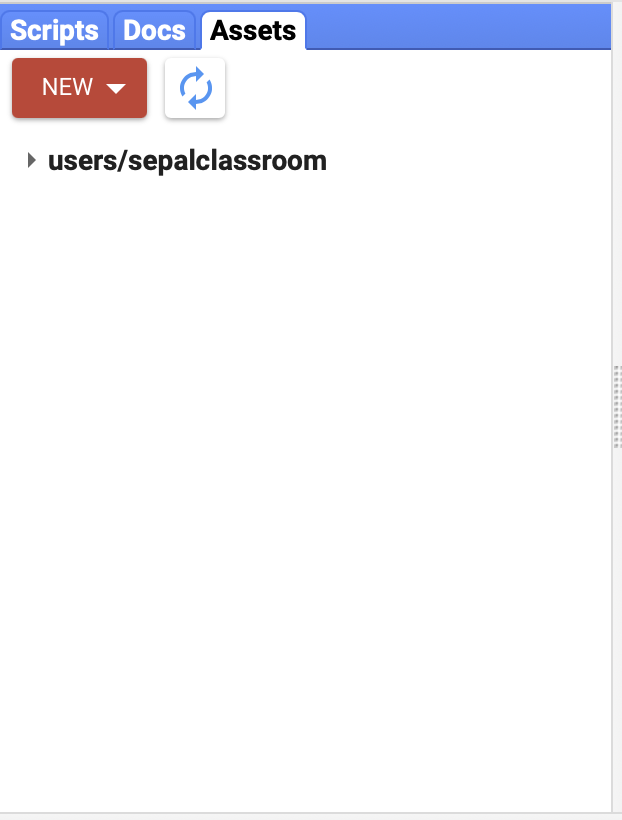
Select New. You will have several choices, including Raster, Shape and Table, which will be described in the following subsections.
Raster#
If you need to upload a raster image:
Select Image.
In the pop-up window, select the file you want to upload from your computer (compatible formats include
.tiff,.tif,.json,.tfrecordor.tfrecord.gz; the name of your asset can be changed in the next text field).
Tip
By default, the asset will be named after the basename.

Shape#
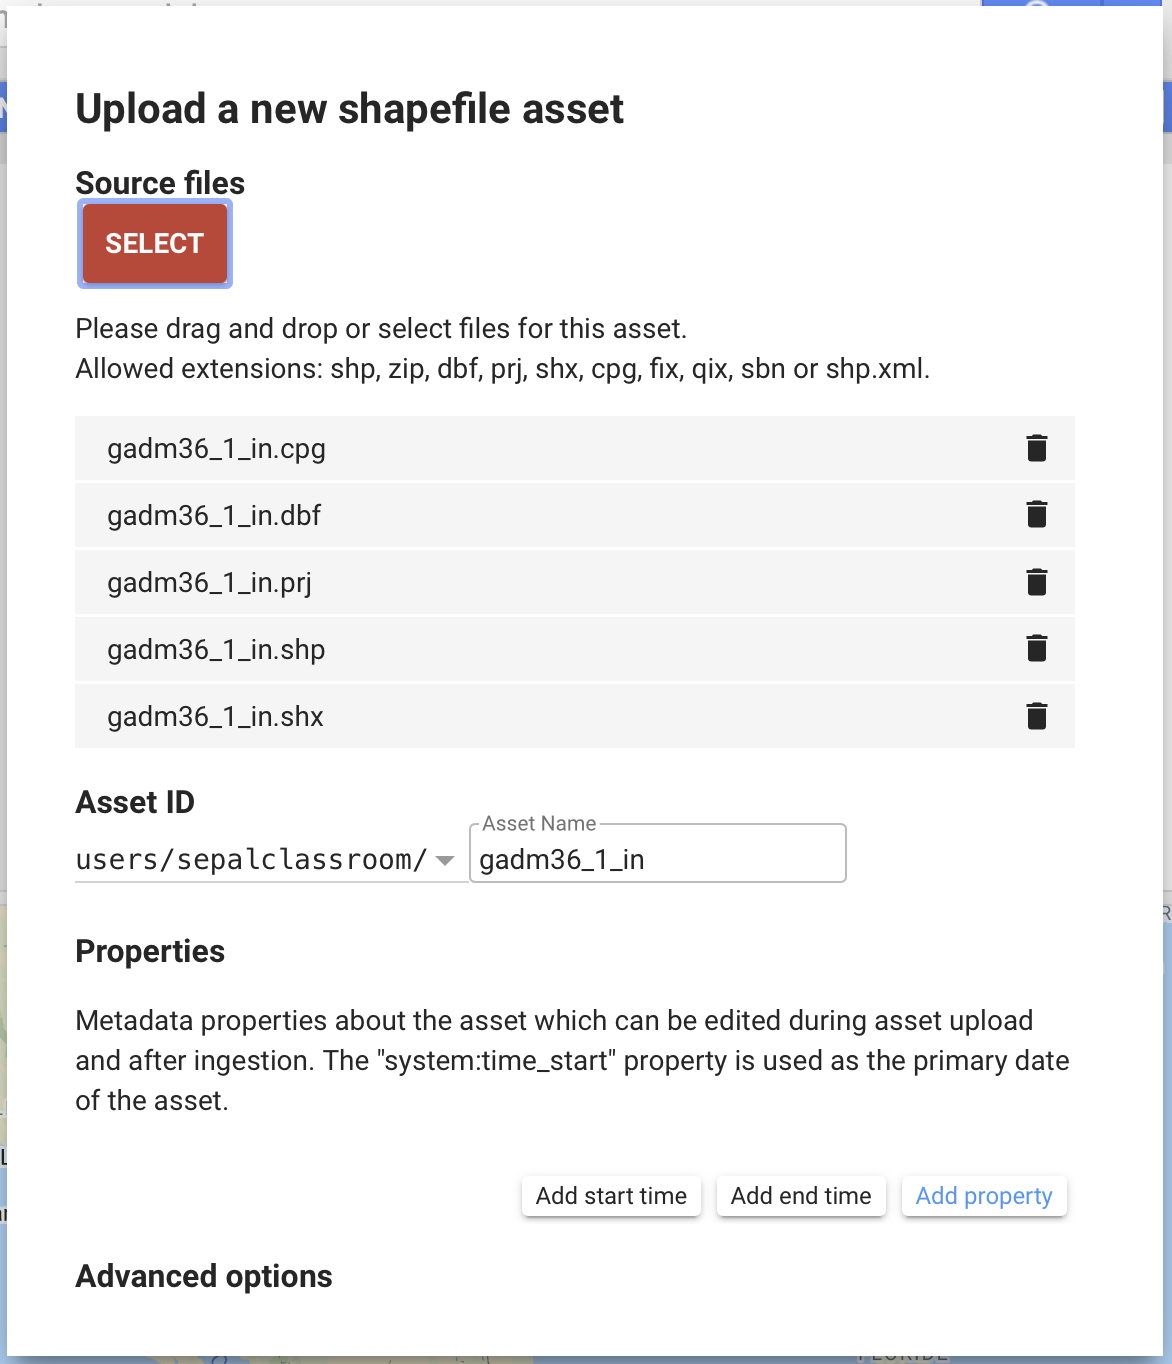
If you need to upload a shape as a ee.FeatureCollection:
Select Shape upload.
In the pop-up window, select the file you want to upload from your computer (note: compatible formats include
.shp,.zip,.dbf,.prj,.shx,.cpg,.fix,.qix,.sbnor.shp.xml; if you didn’t compress the file, a.shpalone is not sufficient and must be accompanied with other files describing the shape as in the example in the image below).
Table#
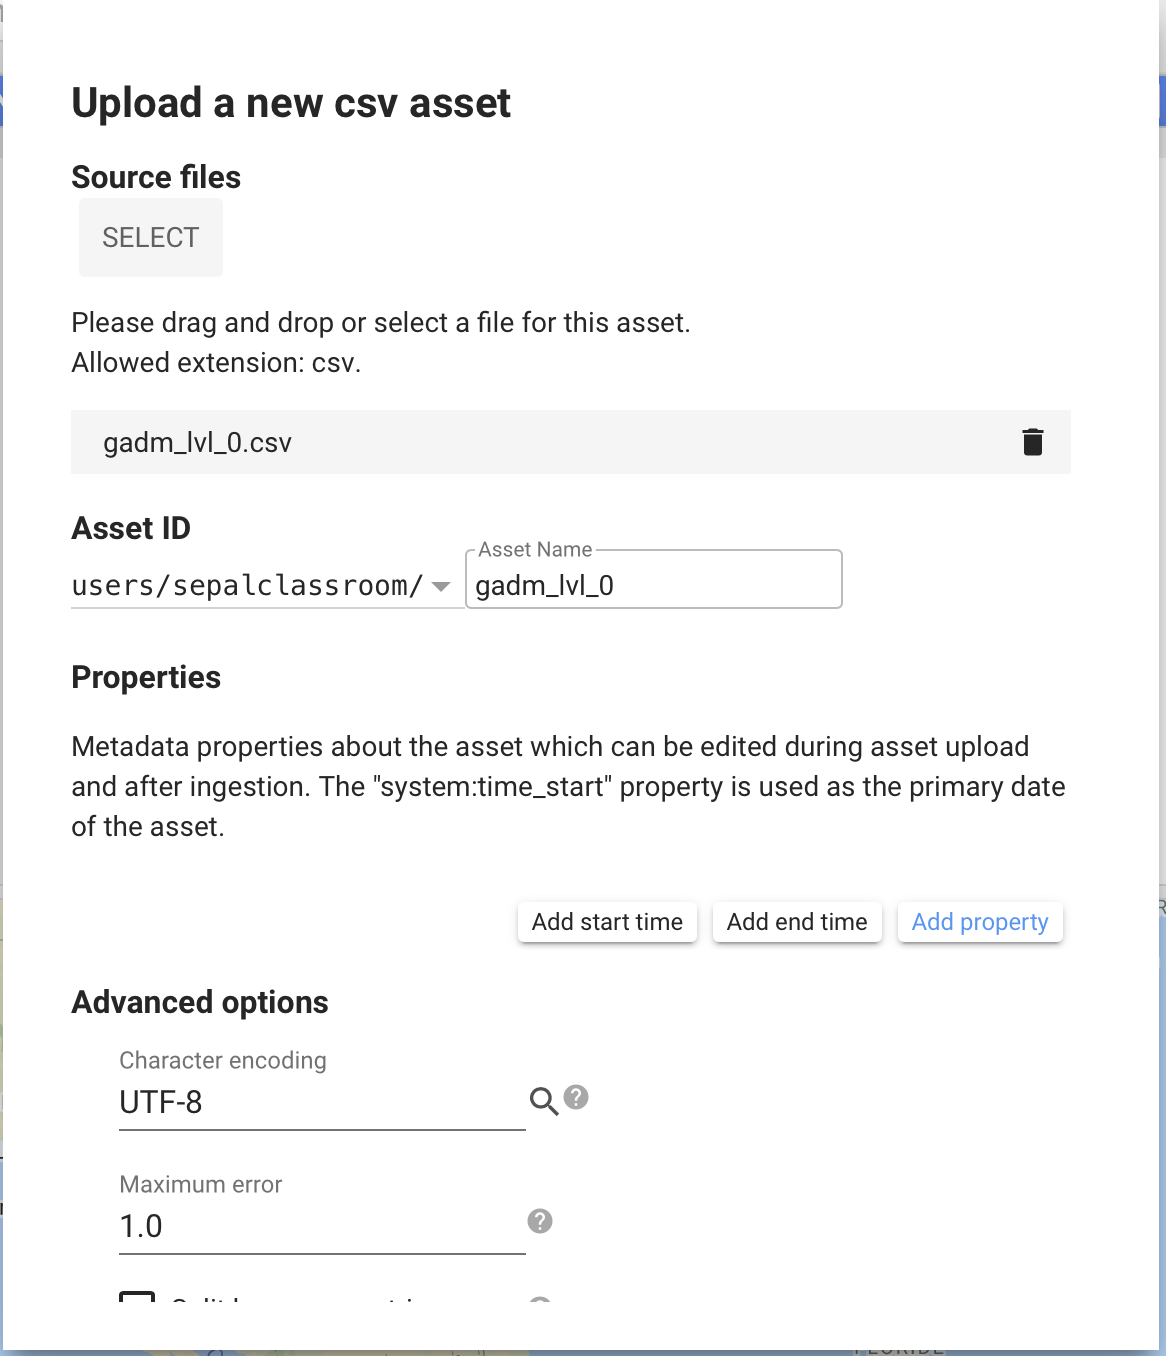
If you need to upload a table as a ee.FeatureCollection:
Select .csv file upload.
In the pop-up window that appears, select the file you want to upload from your computer (note: compatible formats include
.csvand.json).
Use GEE assets in SEPAL#
Once you’ve uploaded your assets, you can use them in SEPAL by copying and pasting the name of each whenever an asset name is requested from the interface.
To find the asset name, go back to Assets in the Zone 1 pane and select any asset in the list. The following pop-up window will appear:
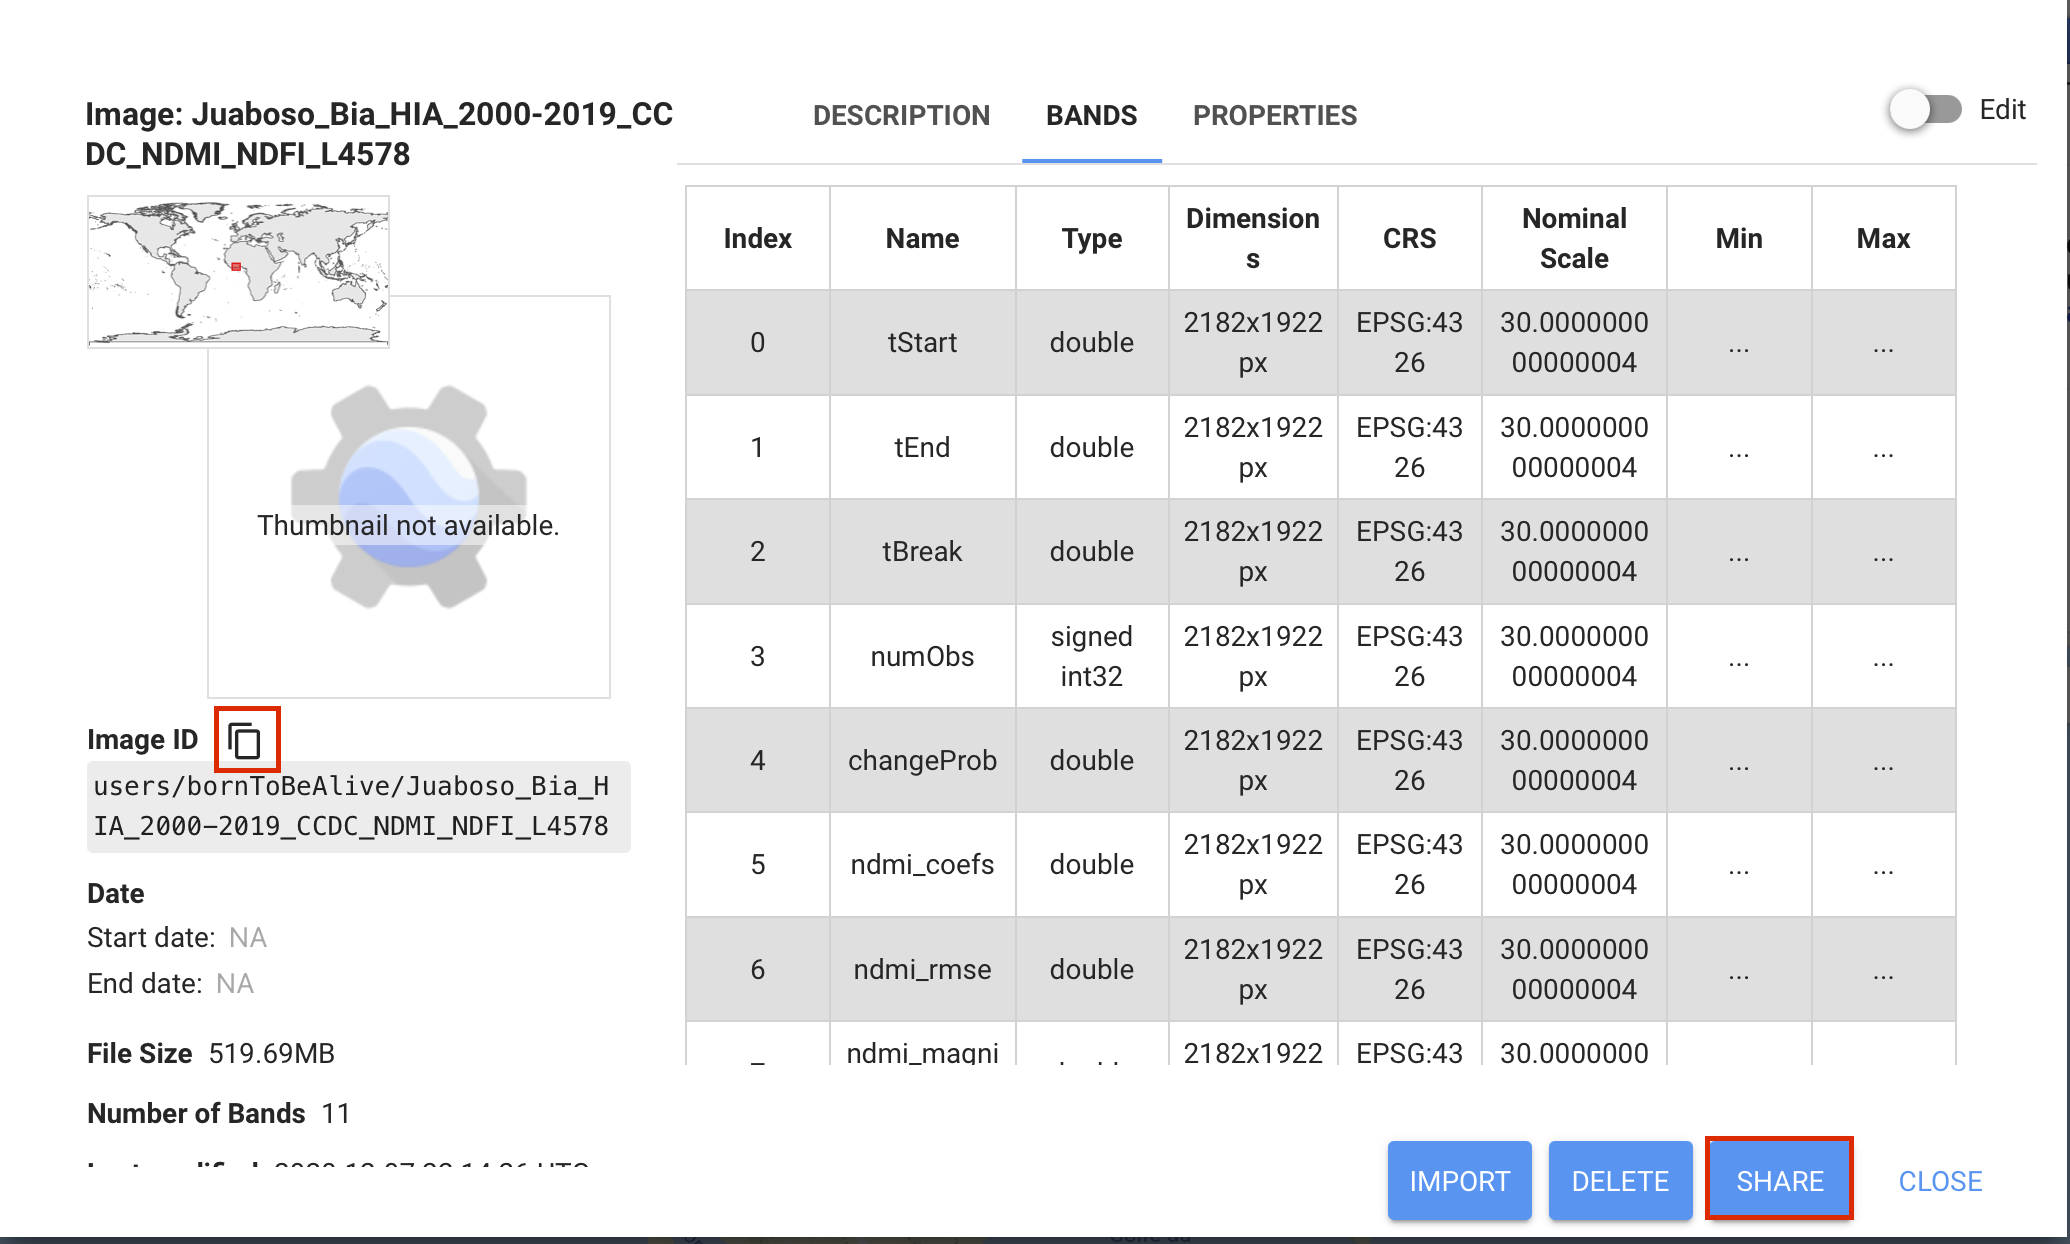
If you select Copy link, the link will be copied to the clipboard and you can paste it into SEPAL or send it to someone for authorized use.
Alternatively, you can select Share and choose between the different sharing options.