Class change#
Build a class change map between two categorical maps that share the same legend with the Class change recipe
Overview#
Often, we want to build the class change map between two categorical maps that share the same legend. If the two images are taken at different times, this can help us understand how the vegetation classification has evolved between two dates. It can be tedious to build the new legend (forest -> forest, forest -> urban, etc.) and manually write the rules to identify each class. SEPAL will automatically build the legend of the resulting categorical map from the initial legend and compute all pixels automatically.
Note
This recipe is not computationally demanding; you can safely reuse the recipe without exporting other recipes. It will not slow down downstream processes.
Start#
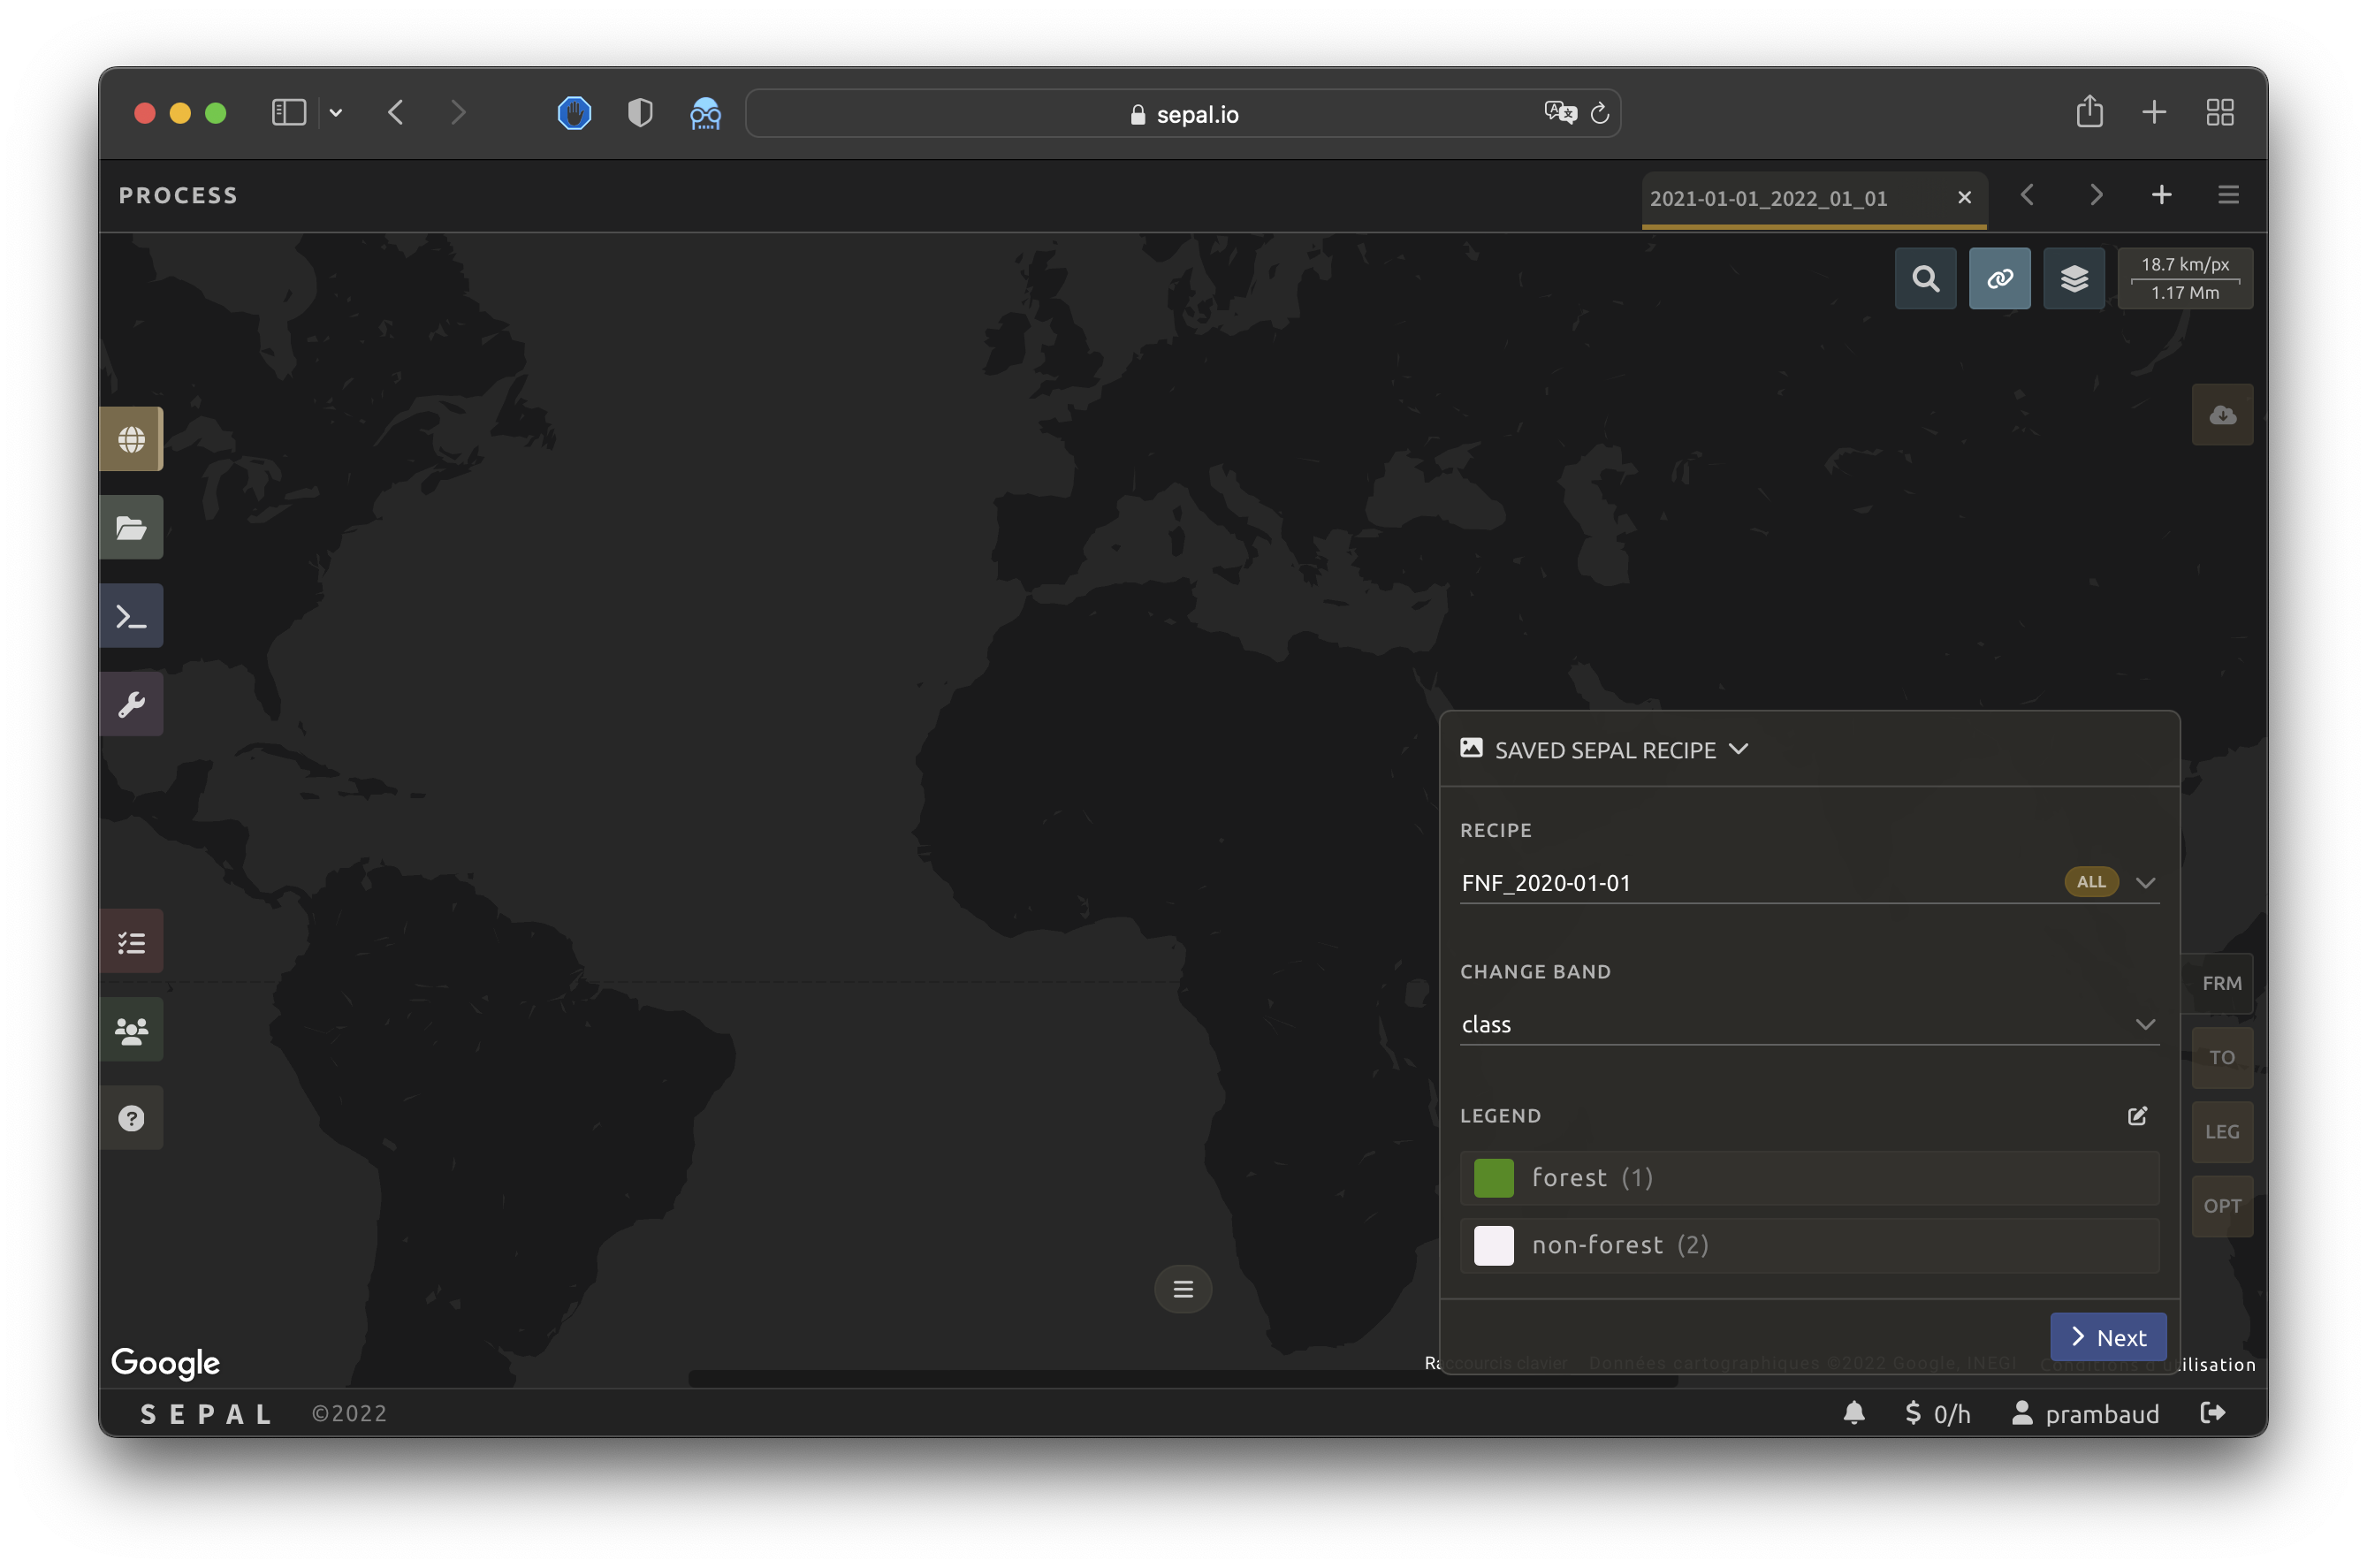
Once the Class change recipe is selected, SEPAL will present the Process in a new tab (see 1 in figure below).
Parameters will open in the lower-right side of your screen (2).
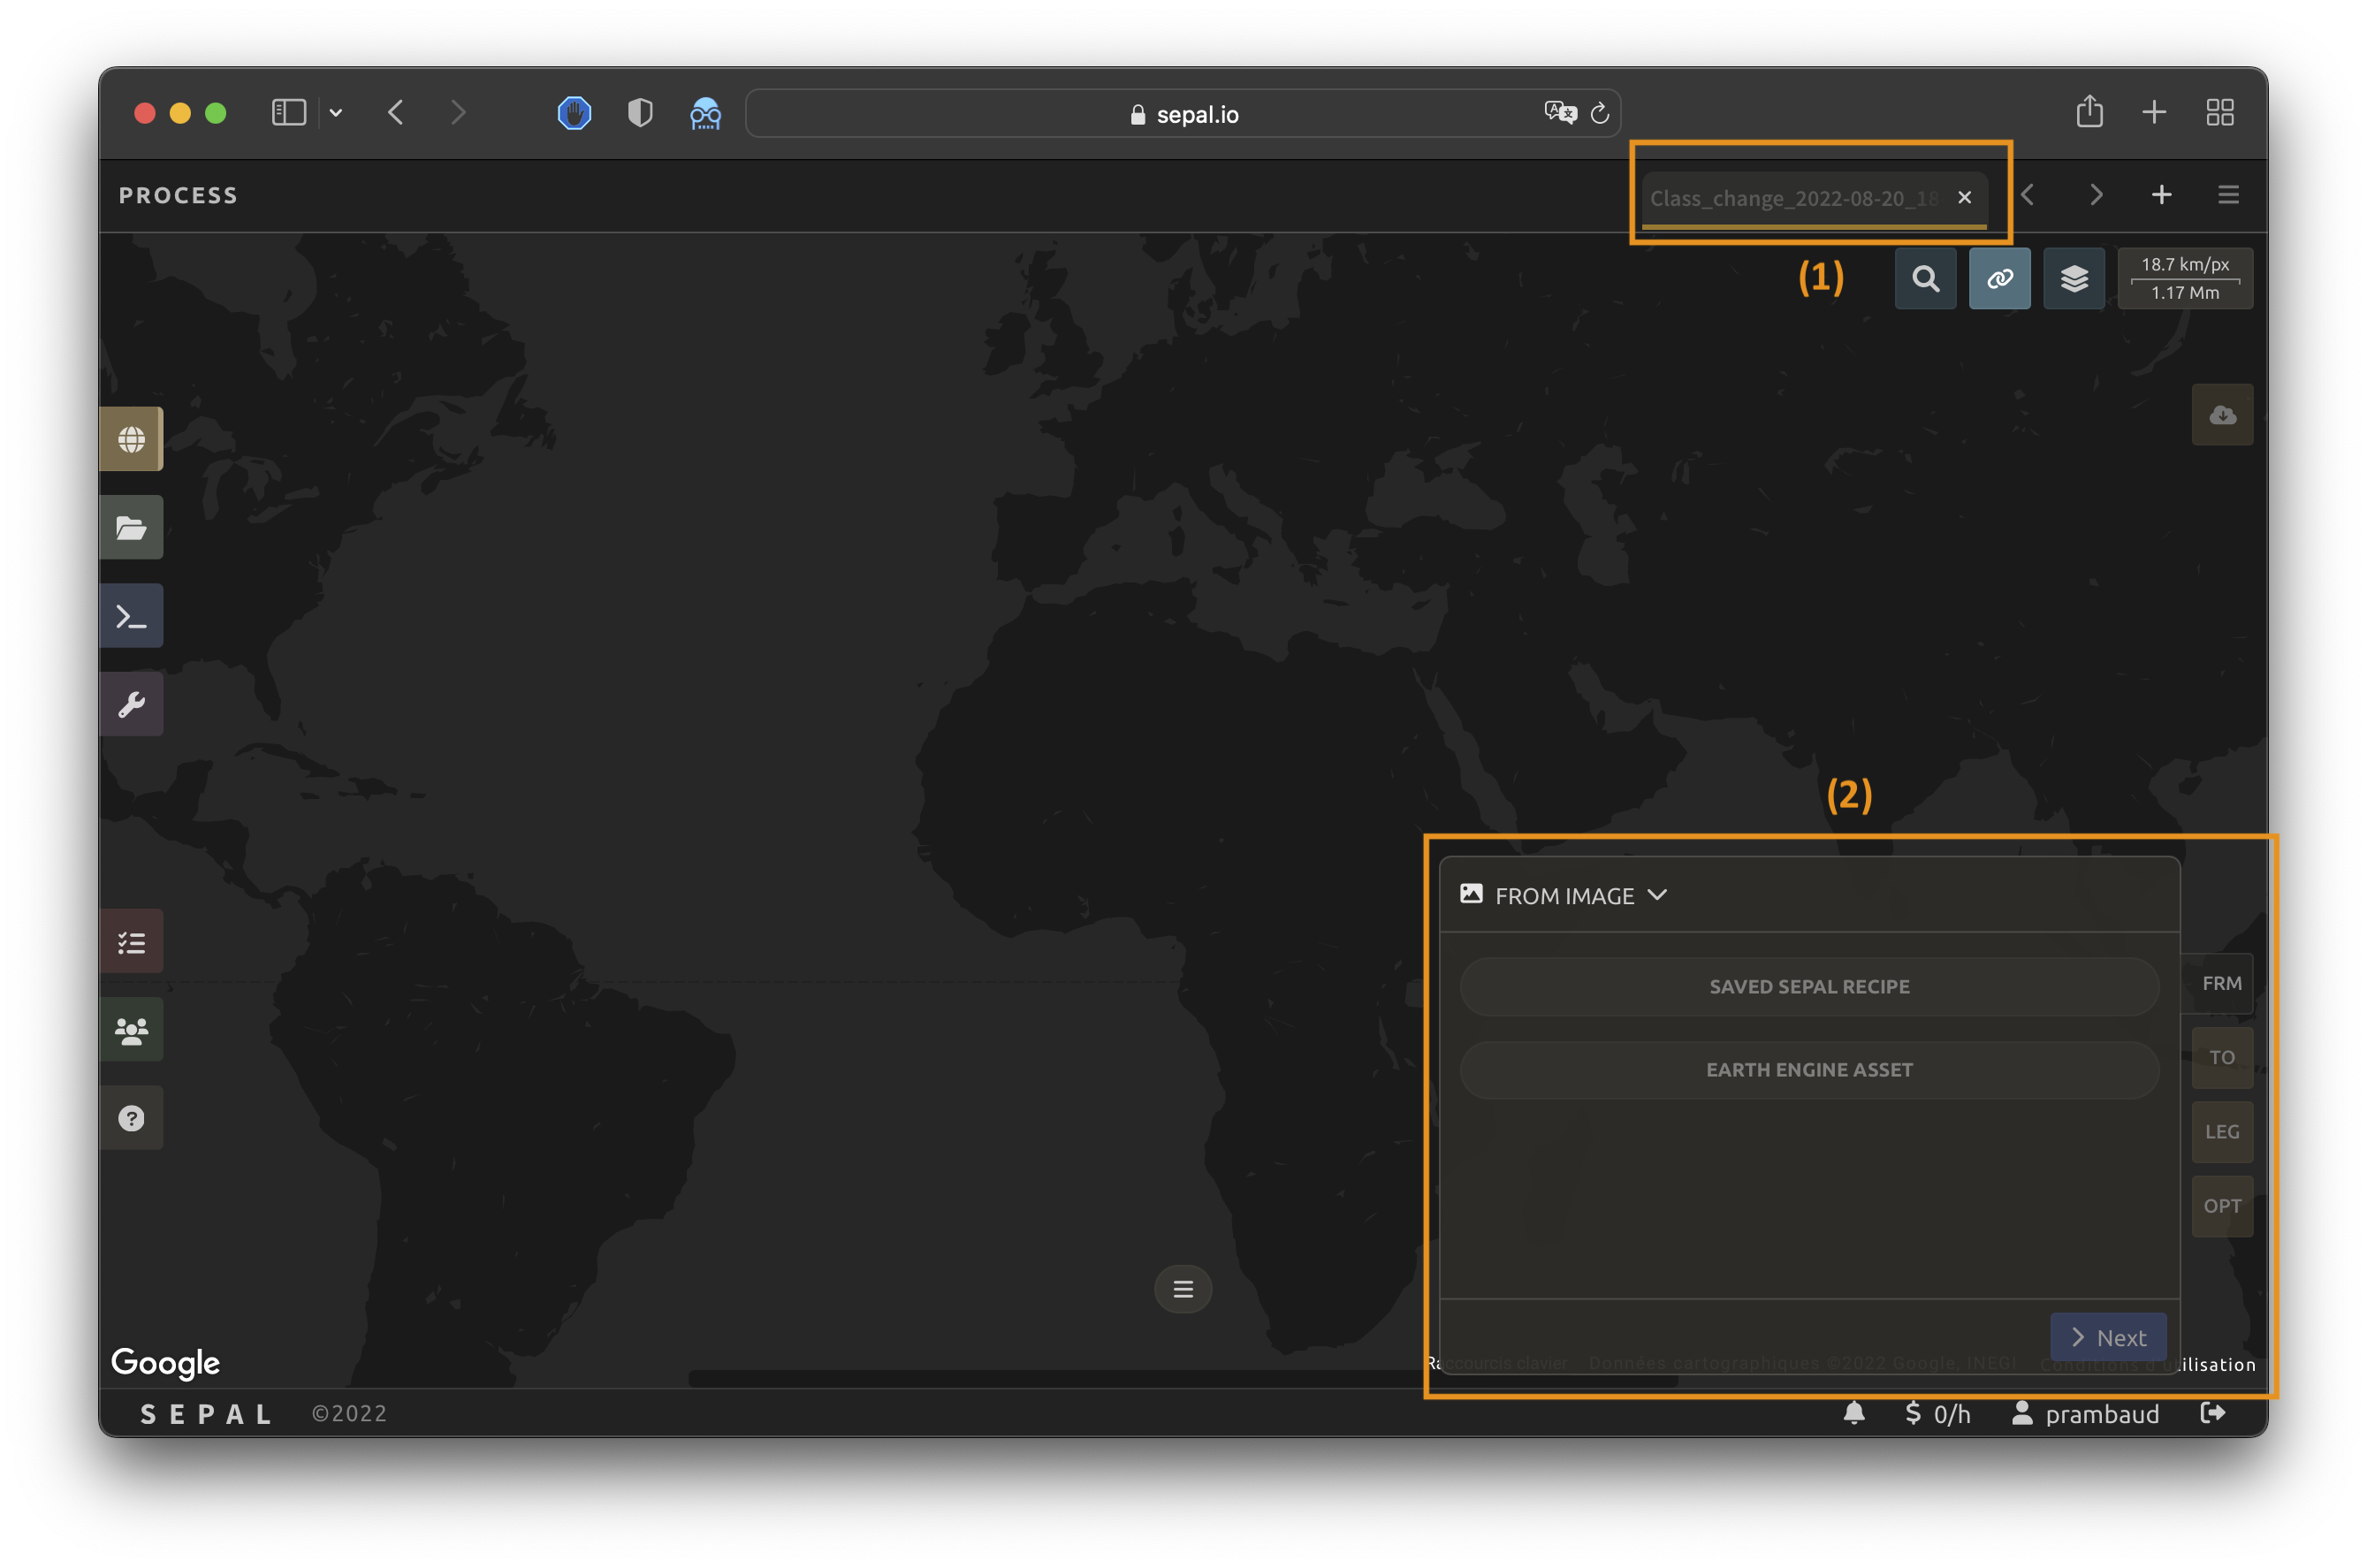
The first step is to change the name of the recipe. This name will be used to name your files and recipes in SEPAL folders. Use the best-suited convention for your need. Simply double-click the tab and enter a new name (it will default to Class_change_<now>).


Parameters#
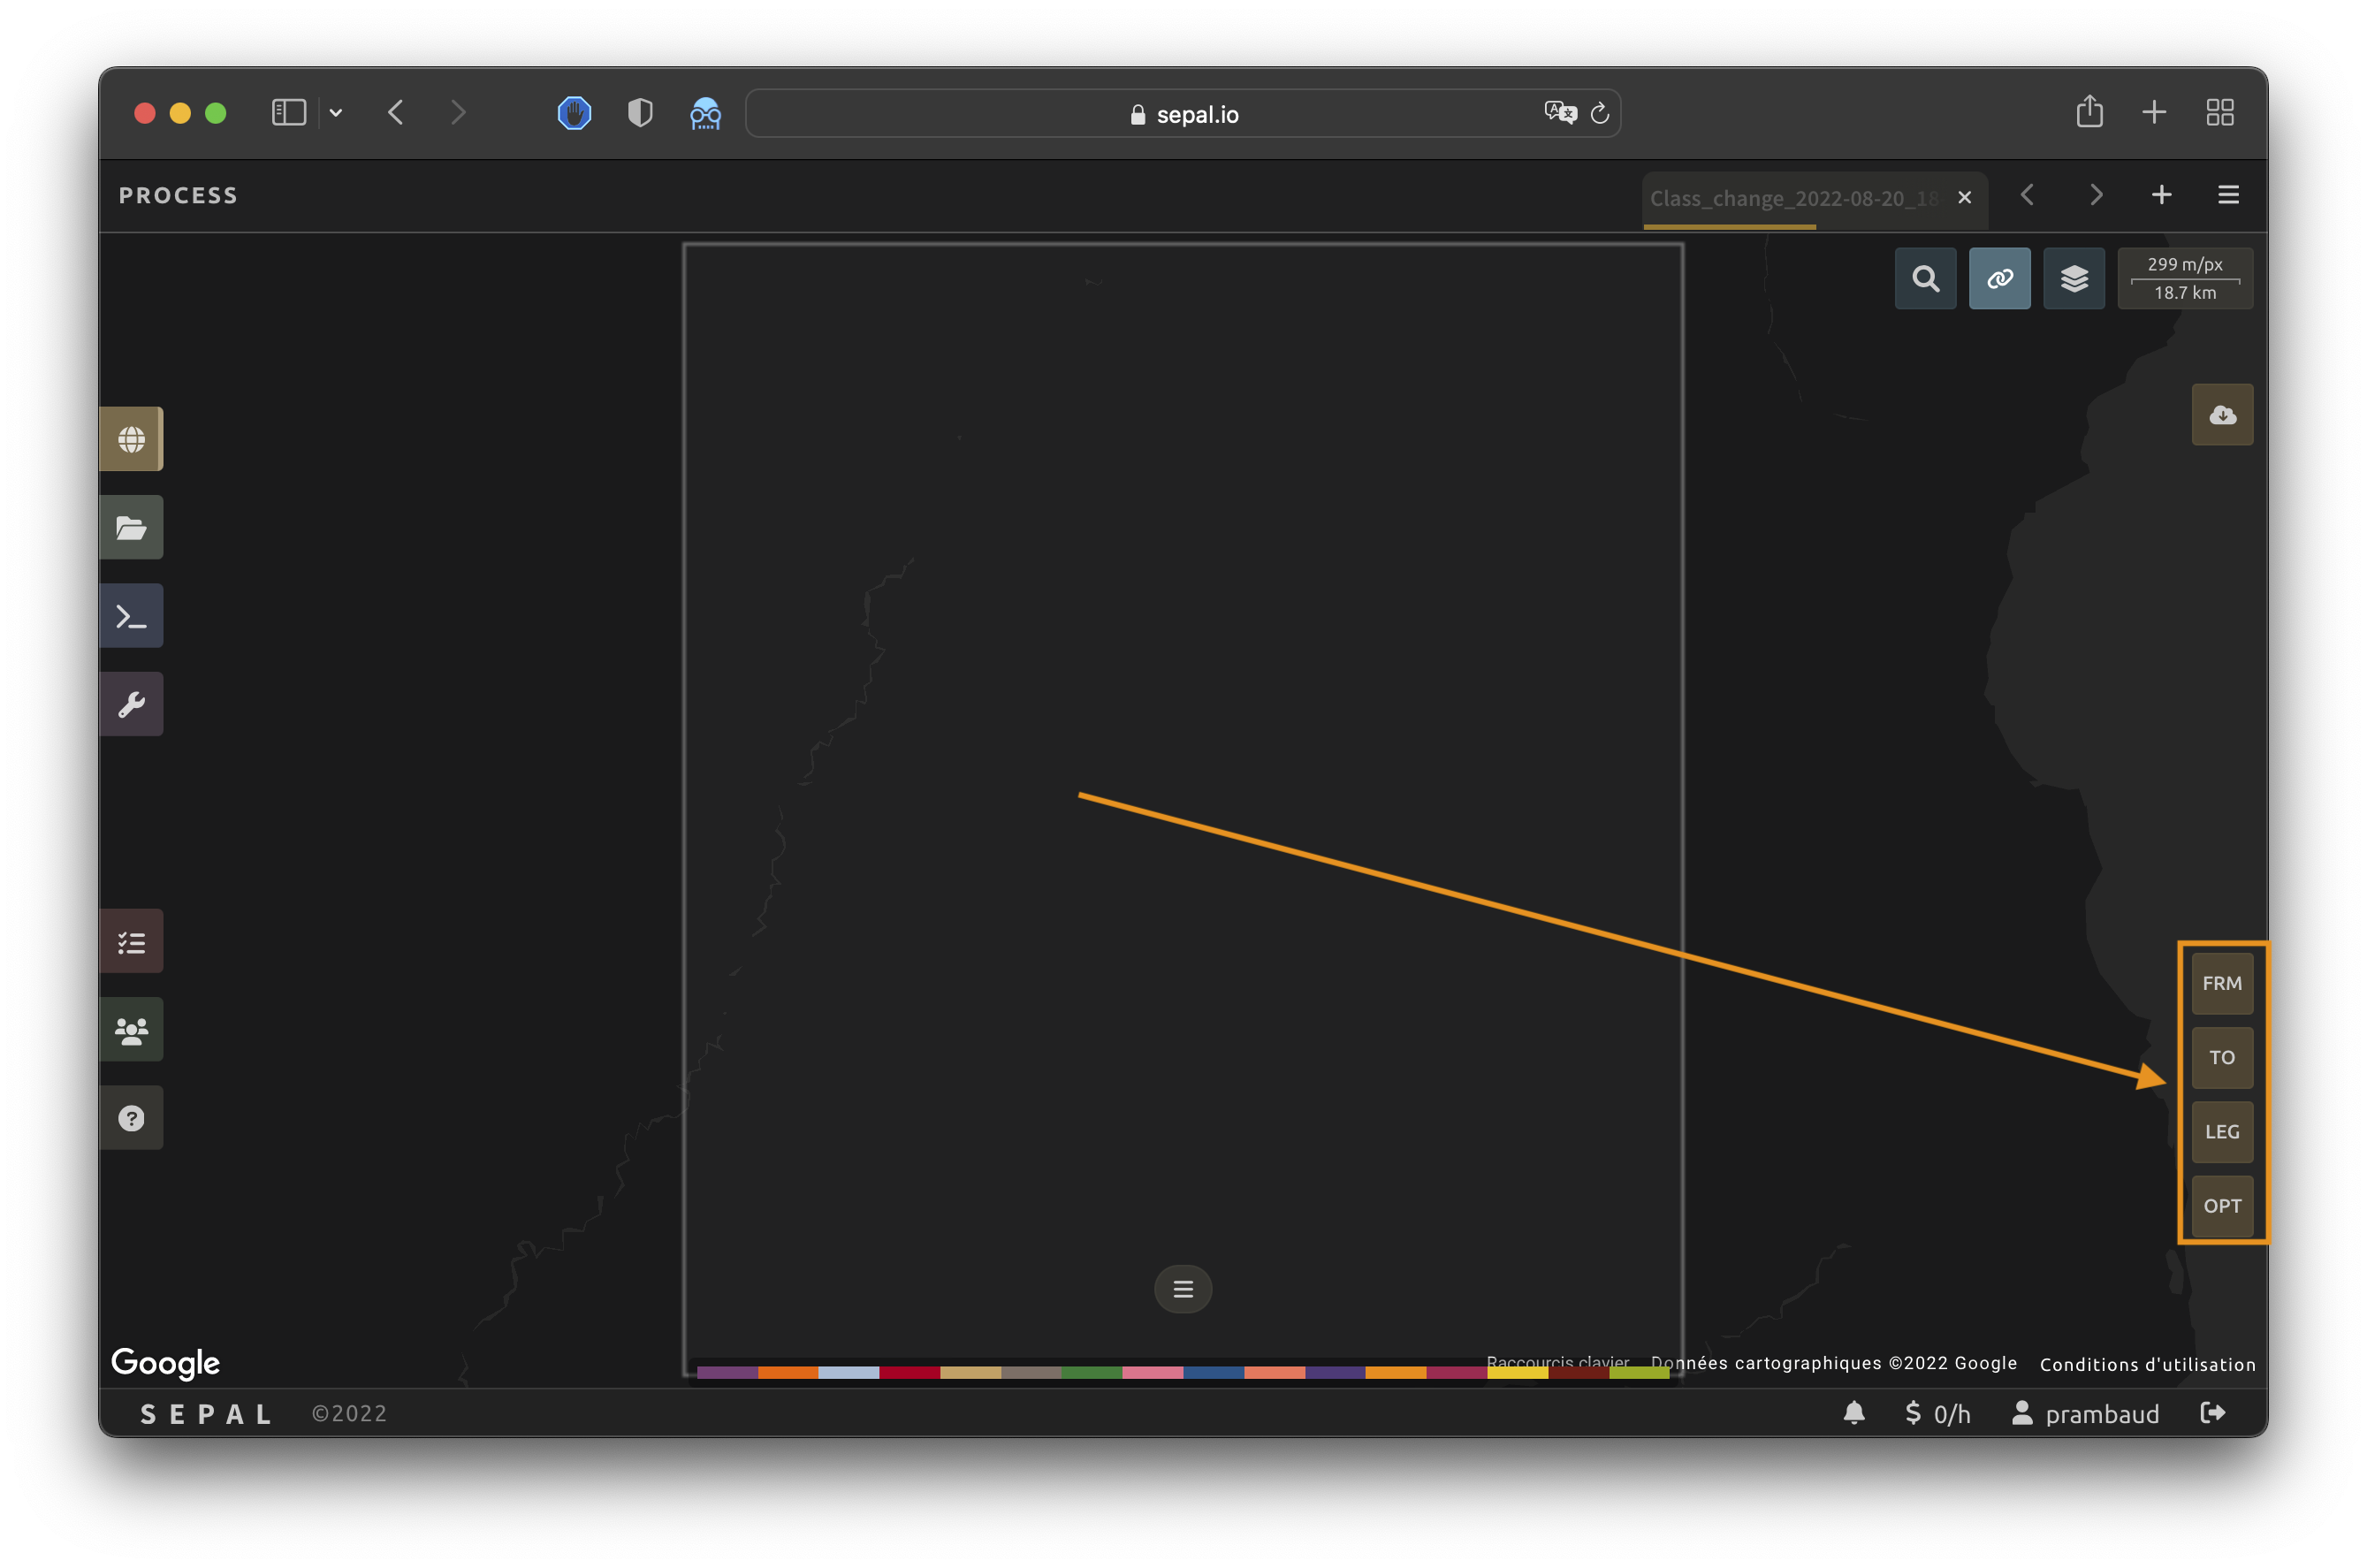
In the lower-right corner, the following four tabs are available, allowing users to customize the class change to their needs:
FRM: the source categorical image
TO: the destination categorical image
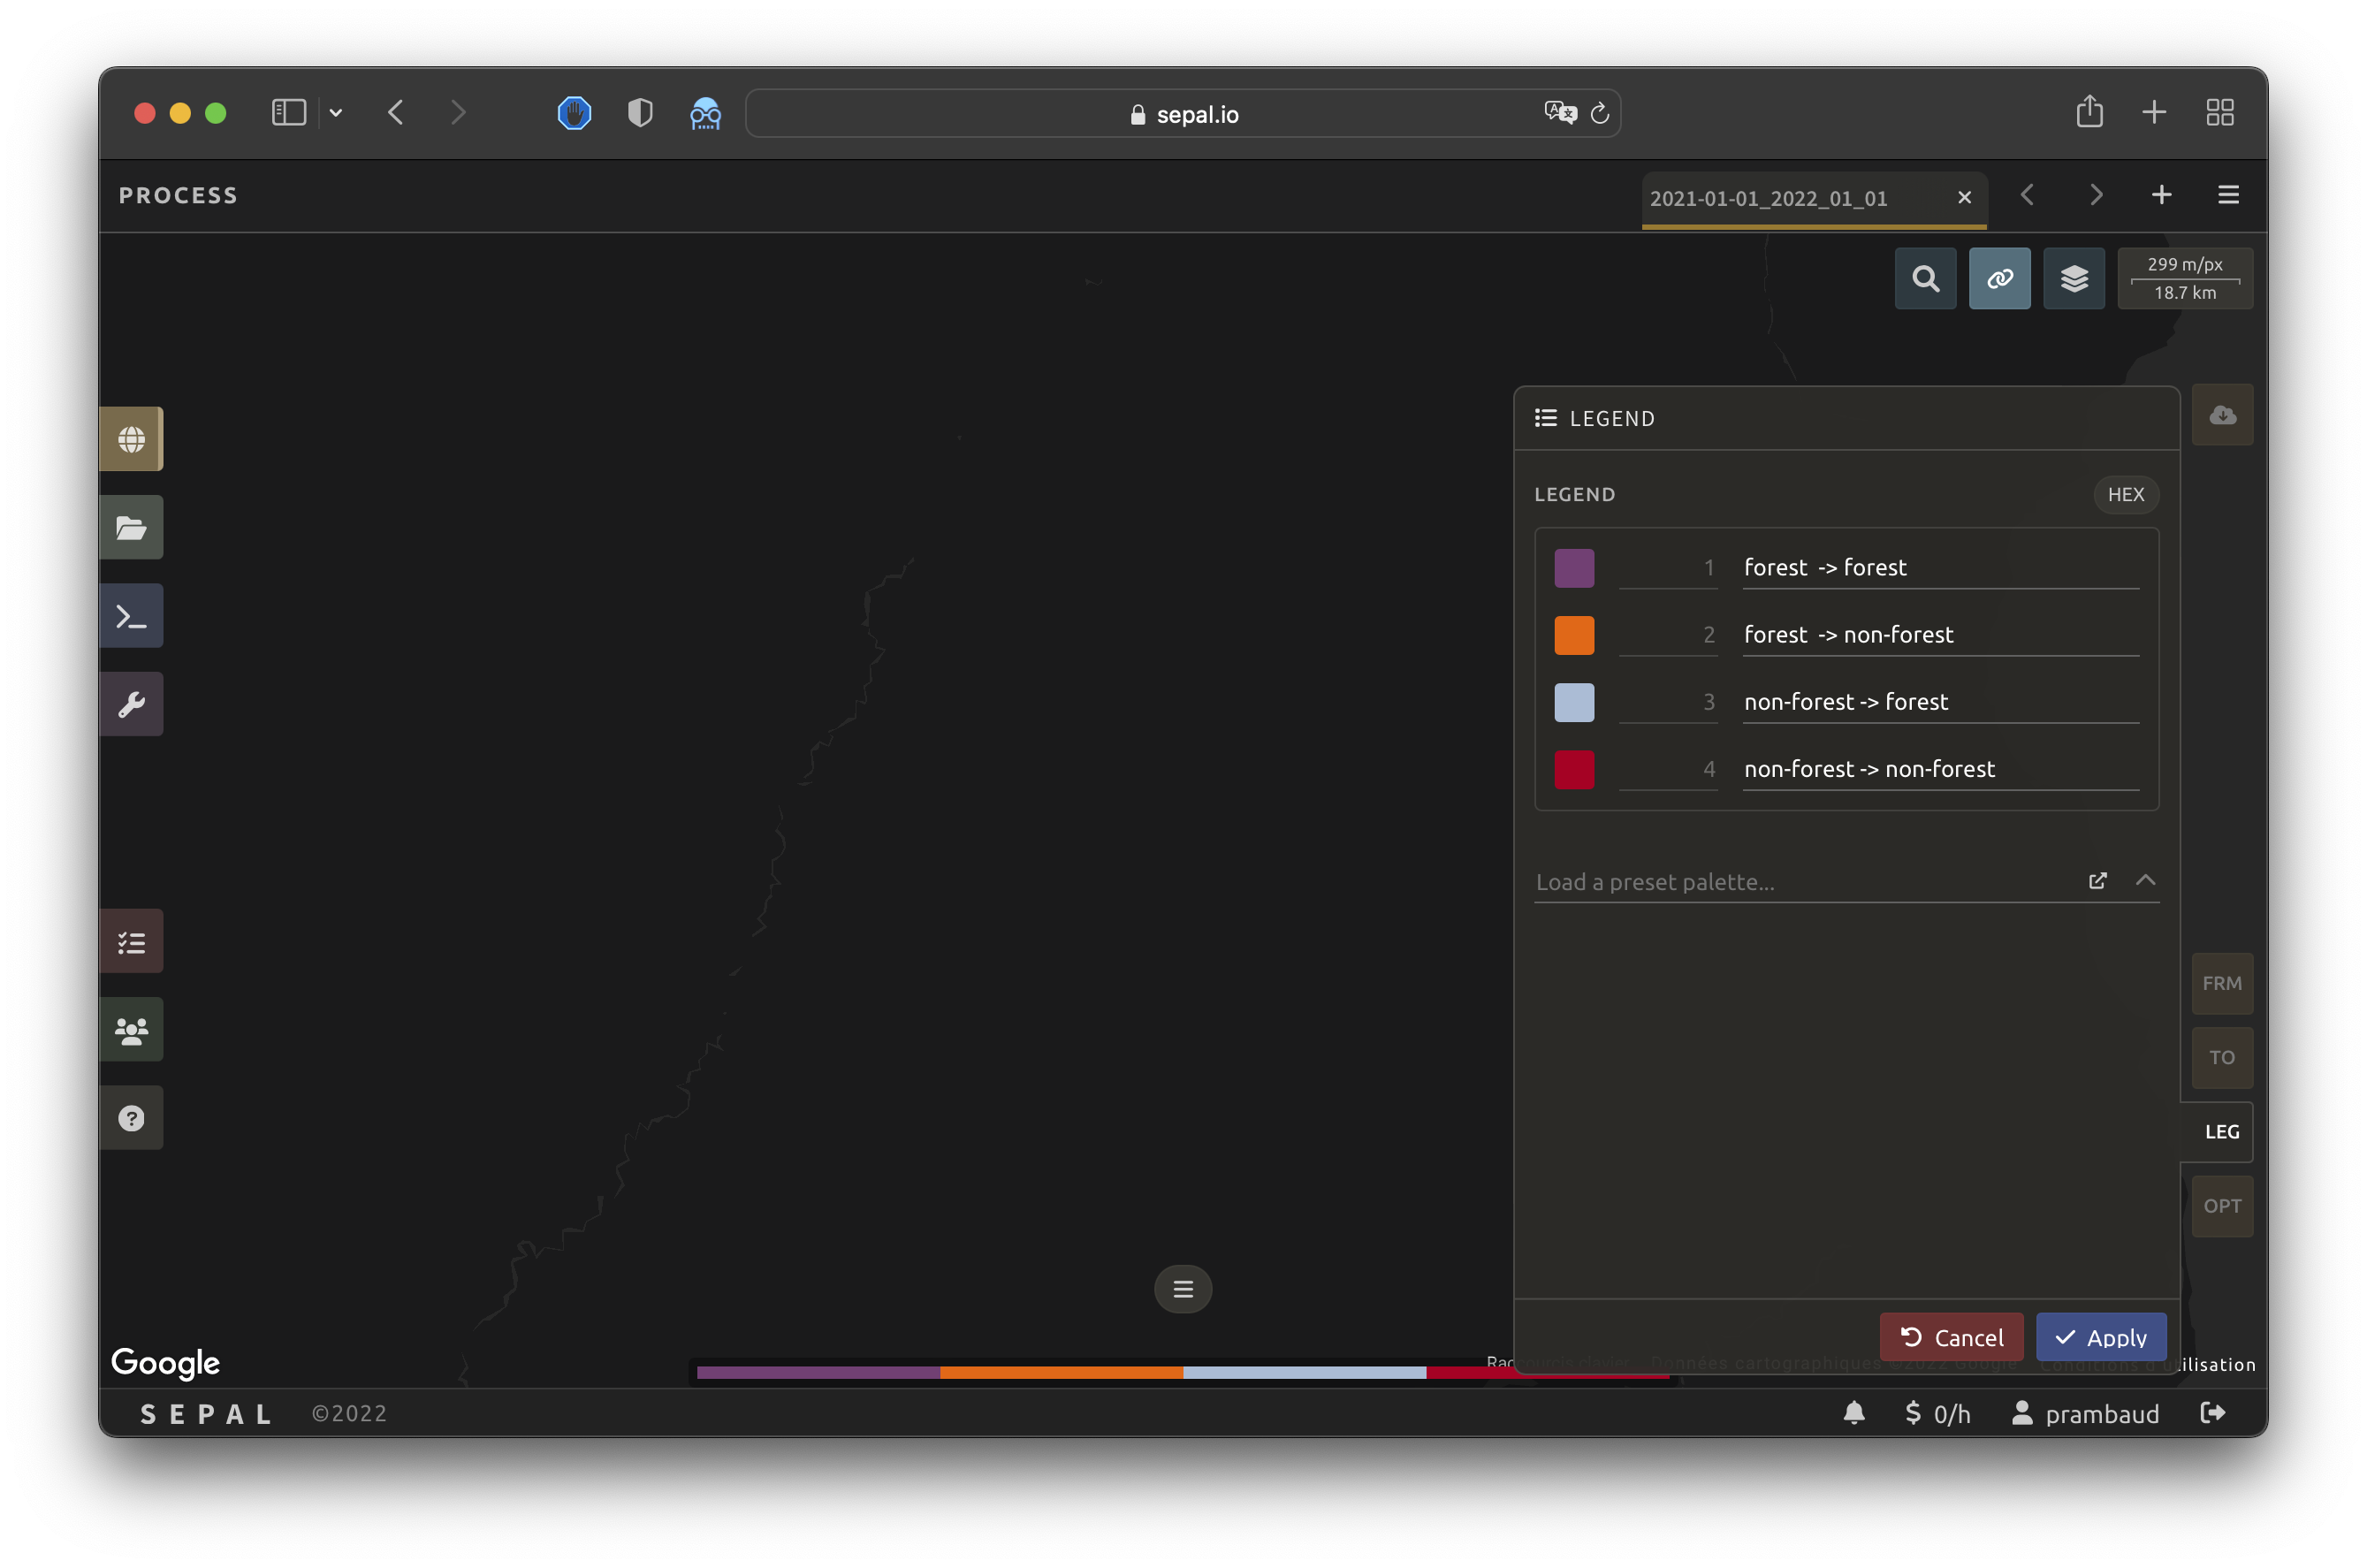
LEG: the legend of the transition classes
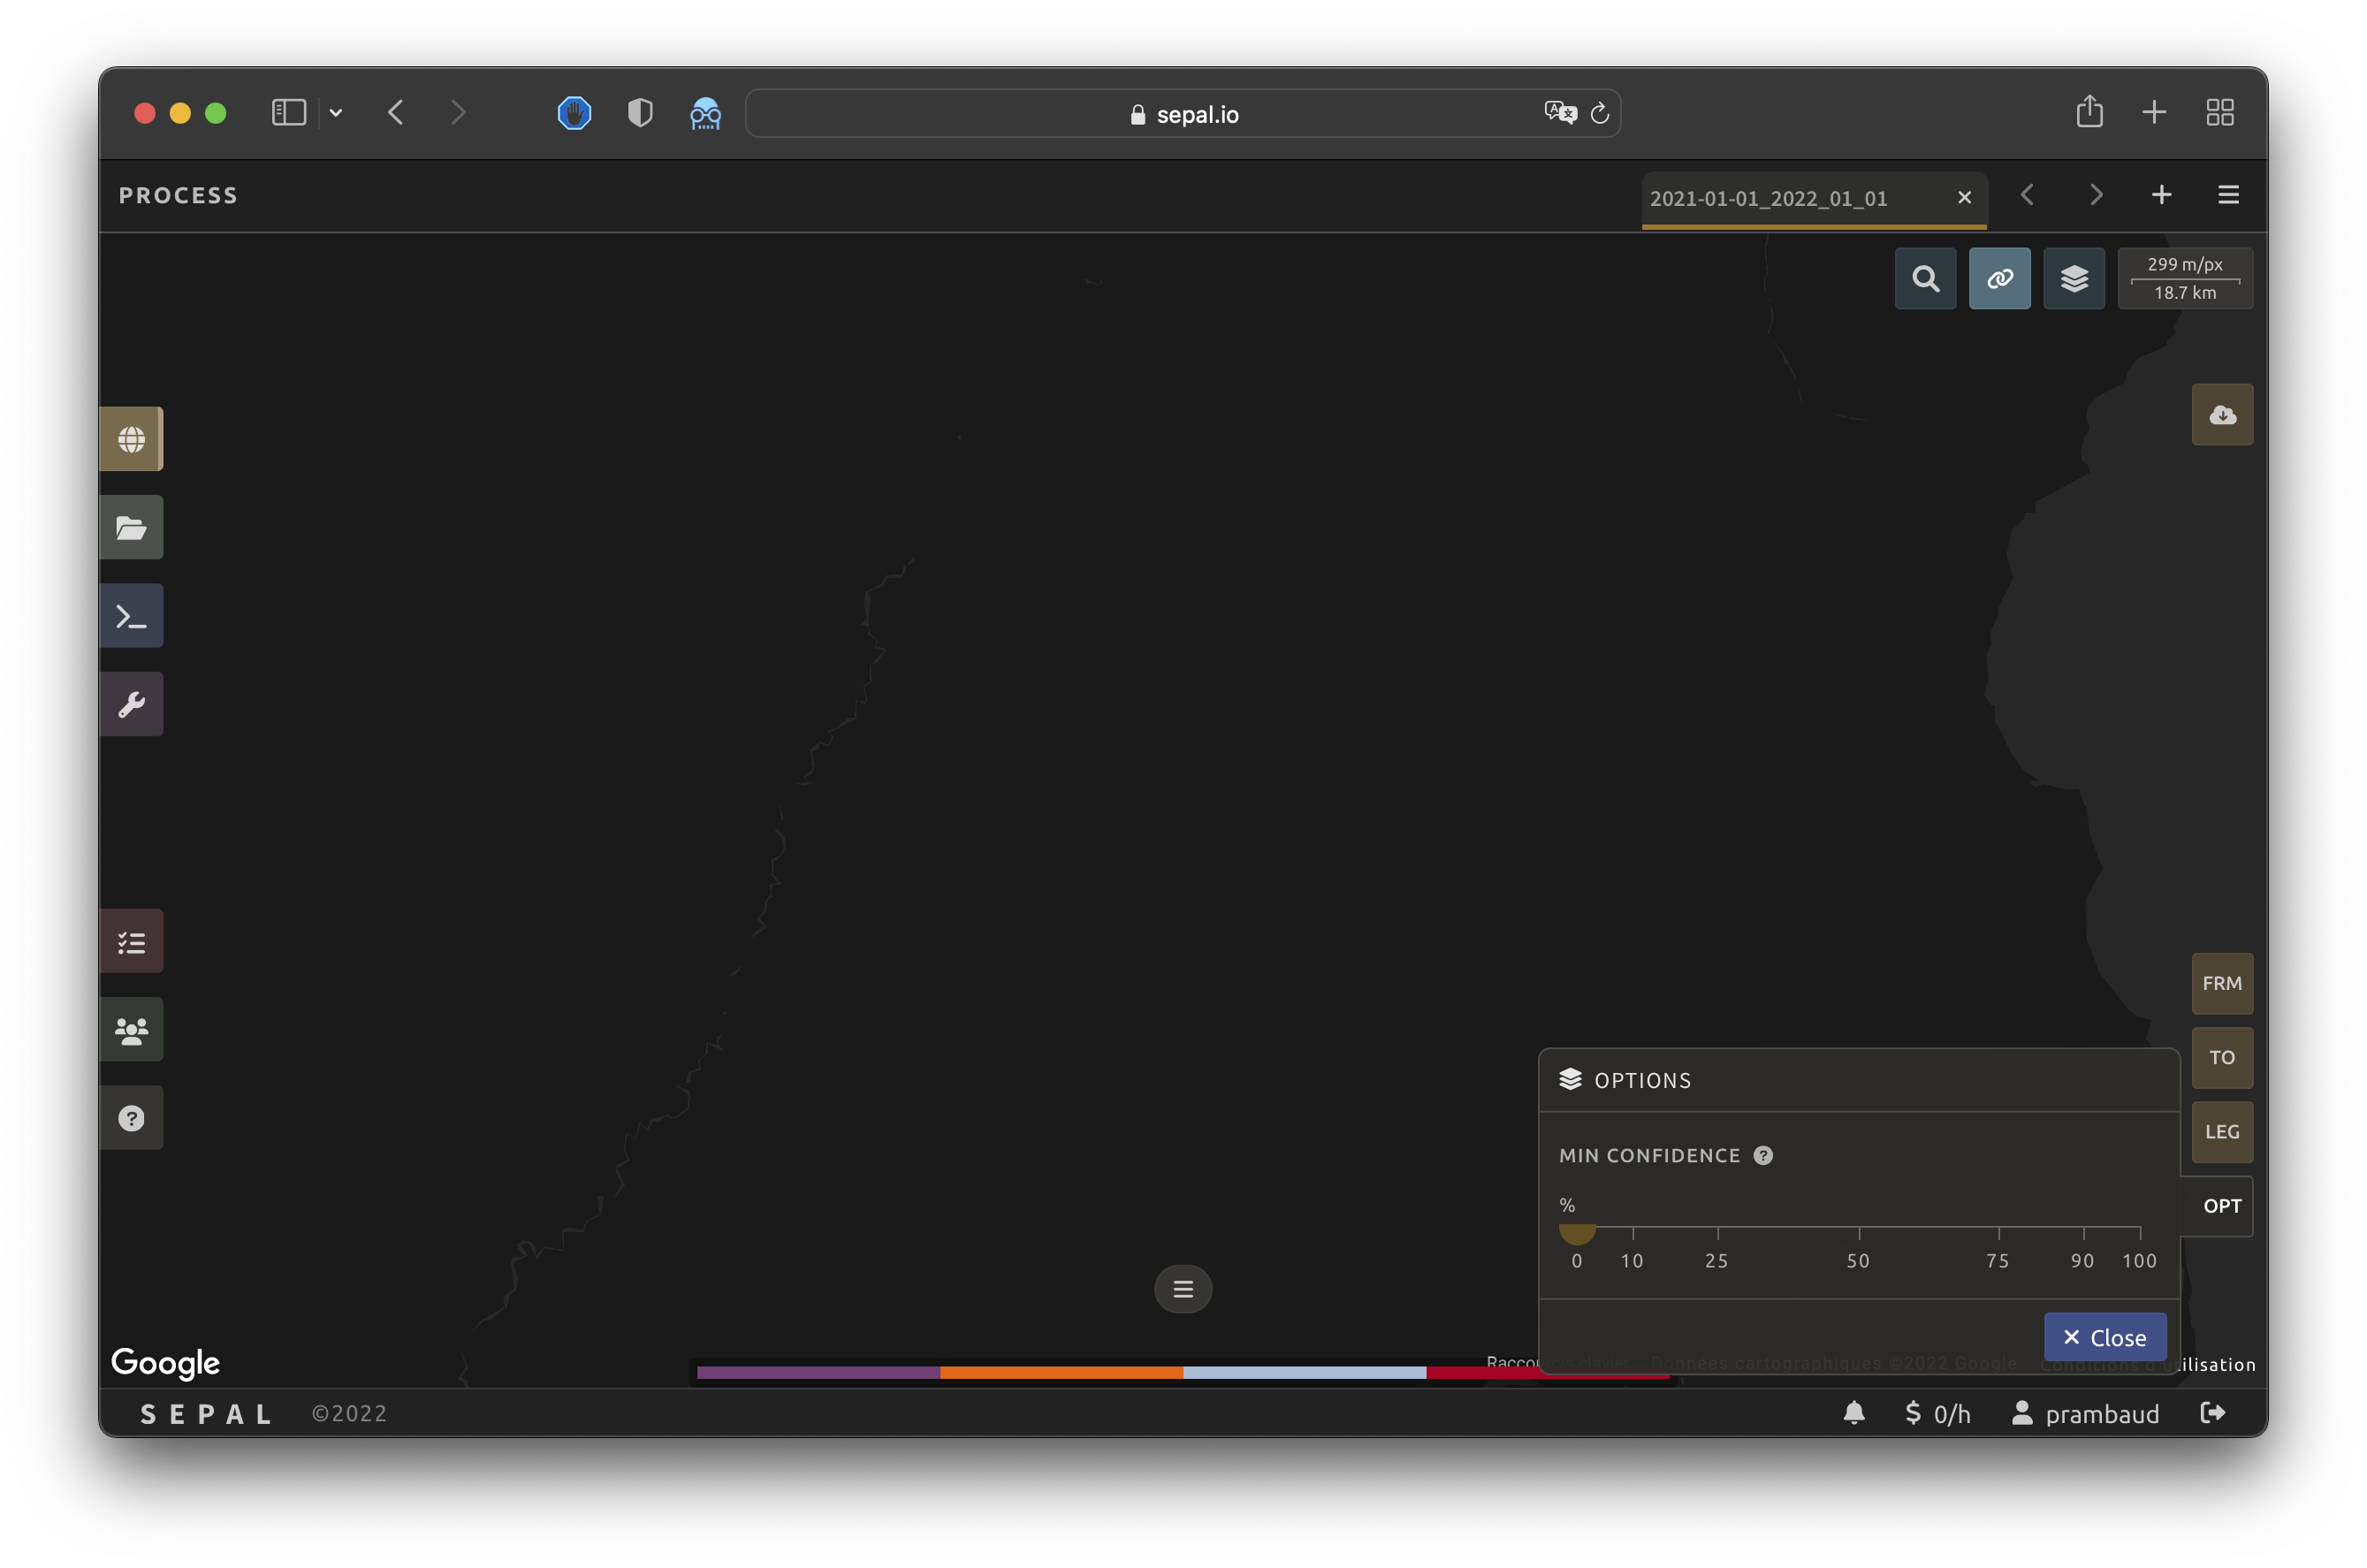
OPT: the optional parameters of the recipe
Select images#
The first step is to select the two images to compare. Since FRM and TO have the same interface, they will be described together.
Select a categorical image, which can be a classification recipe or any categorical asset from your Google Earth Engine (GEE) account. In both cases, you’ll need to select the band to use for the transition and the legend.
If the selected asset/recipe is a Classification recipe (or its export), the legend will be automatically generated with the metadata of the file. If it’s not, you’ll need to upload it manually.
Select fa-solid fa-pen-to-square to open the Legend editing tool. It’s the same as the one described in the Classification recipe (see Classification).

Customize legend#
Once both from and to images are selected, SEPAL will build a transition classification legend based on the registered legend in the two parameter images. The color and the values can be modified.

Options#
If the selected asset is from a SEPAL classification, it will embed a probability value for each classified pixel. SEPAL will propose clever map transitioning based on these values.
For example, a high-confidence forest pixel changes into a low-confidence non-forest pixel. The change will be taken into account only if the minimum confidence is reached by the to pixel. By default, no filtering is performed and the slider is set to 0.
Note
If the classified images are from other sources, the probability won’t be available and the transition will be applied without verification.
Analysis#
Export#
Important
You cannot export a recipe as an asset or a .tiff file without a small computation quota (if you are a new user, see Manage your resources).
Select the tab to open the Retrieve pane, where you can select the Exportation parameters.
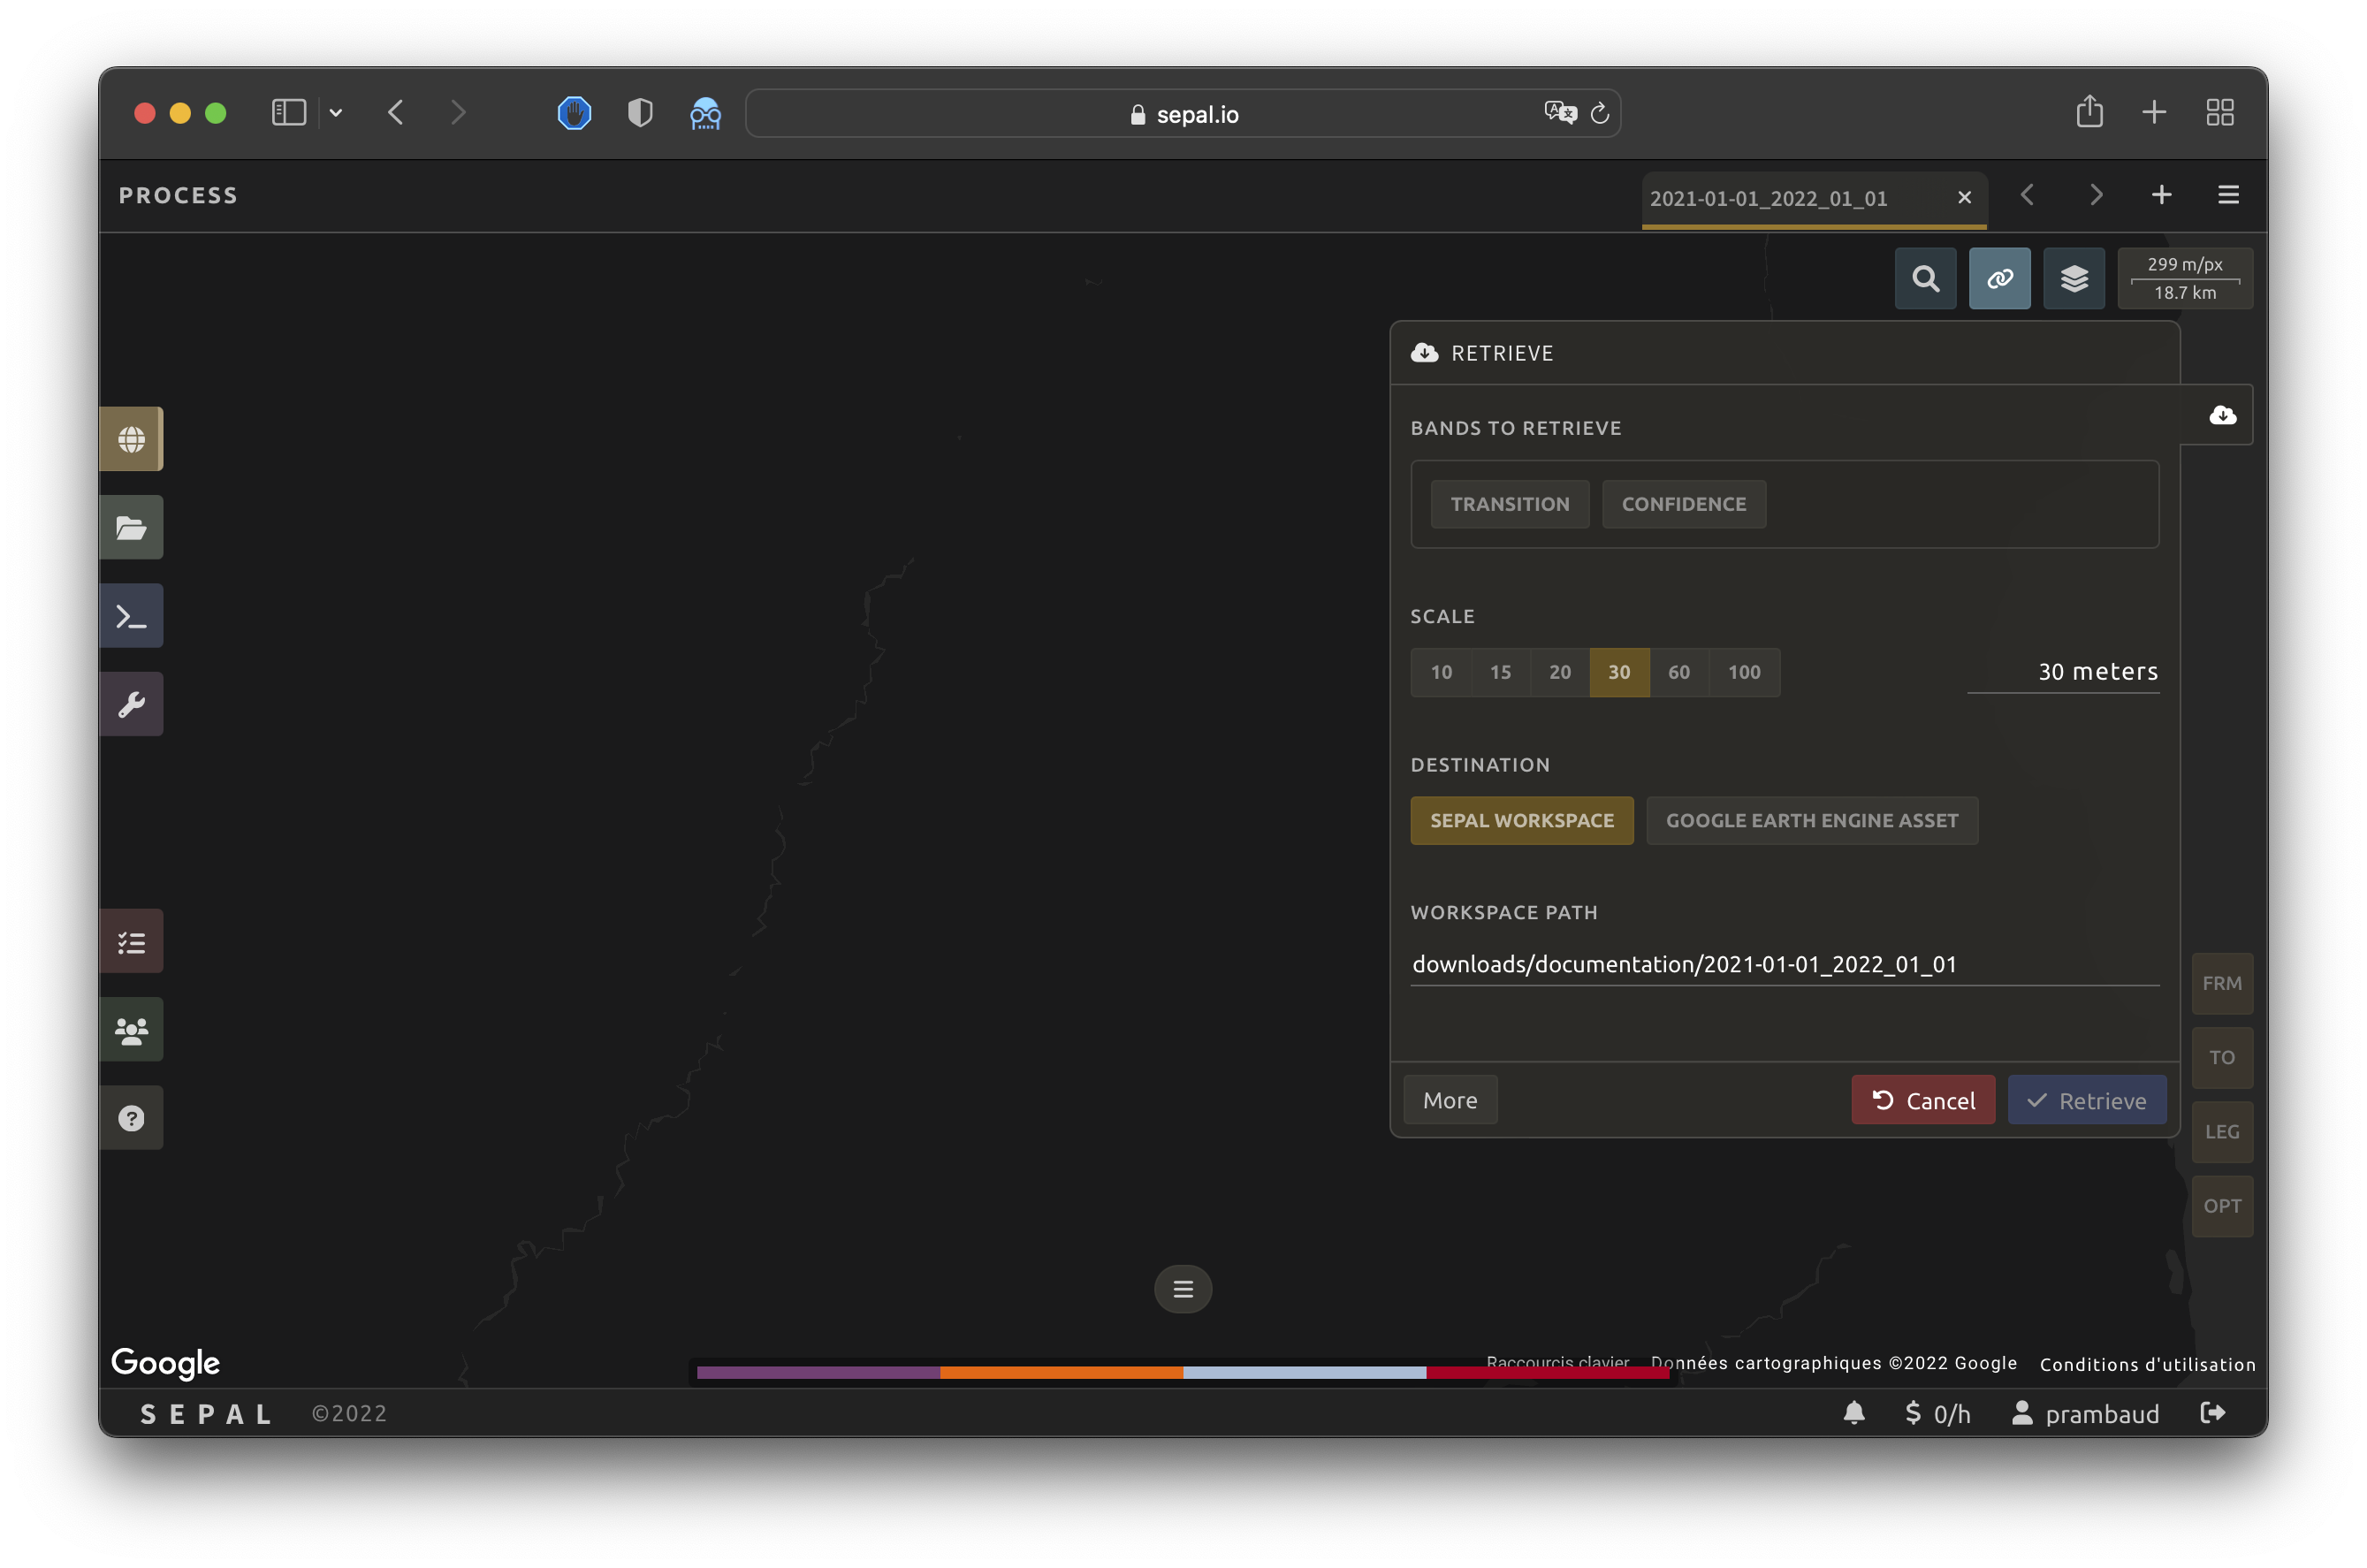
Bands#
Select the band to export in the recipe. You will have access to transition (the new class change values) and confidence, if you selected Classification recipe assets.
Scale#
You can set a custom scale for exportation by changing the value of the slider (m). Requesting a smaller resolution than an image’s native resolution will not improve the quality of the output, just its size, so keep in mind that the native resolution of Sentinel data is 10 m and Landsat is 30 m.
Destination#
You can export the image to SEPAL workspace or to GEE asset. The same image will be exported, but in the first case, you will find it in .tif format in the Downloads folder; in the second case, the image will be exported to your GEE account Asset list.
Attention
If GEE asset is not displayed, your GEE account is not connected to your SEPAL account (see Use GEE with SEPAL).
Select apply to start the download process.
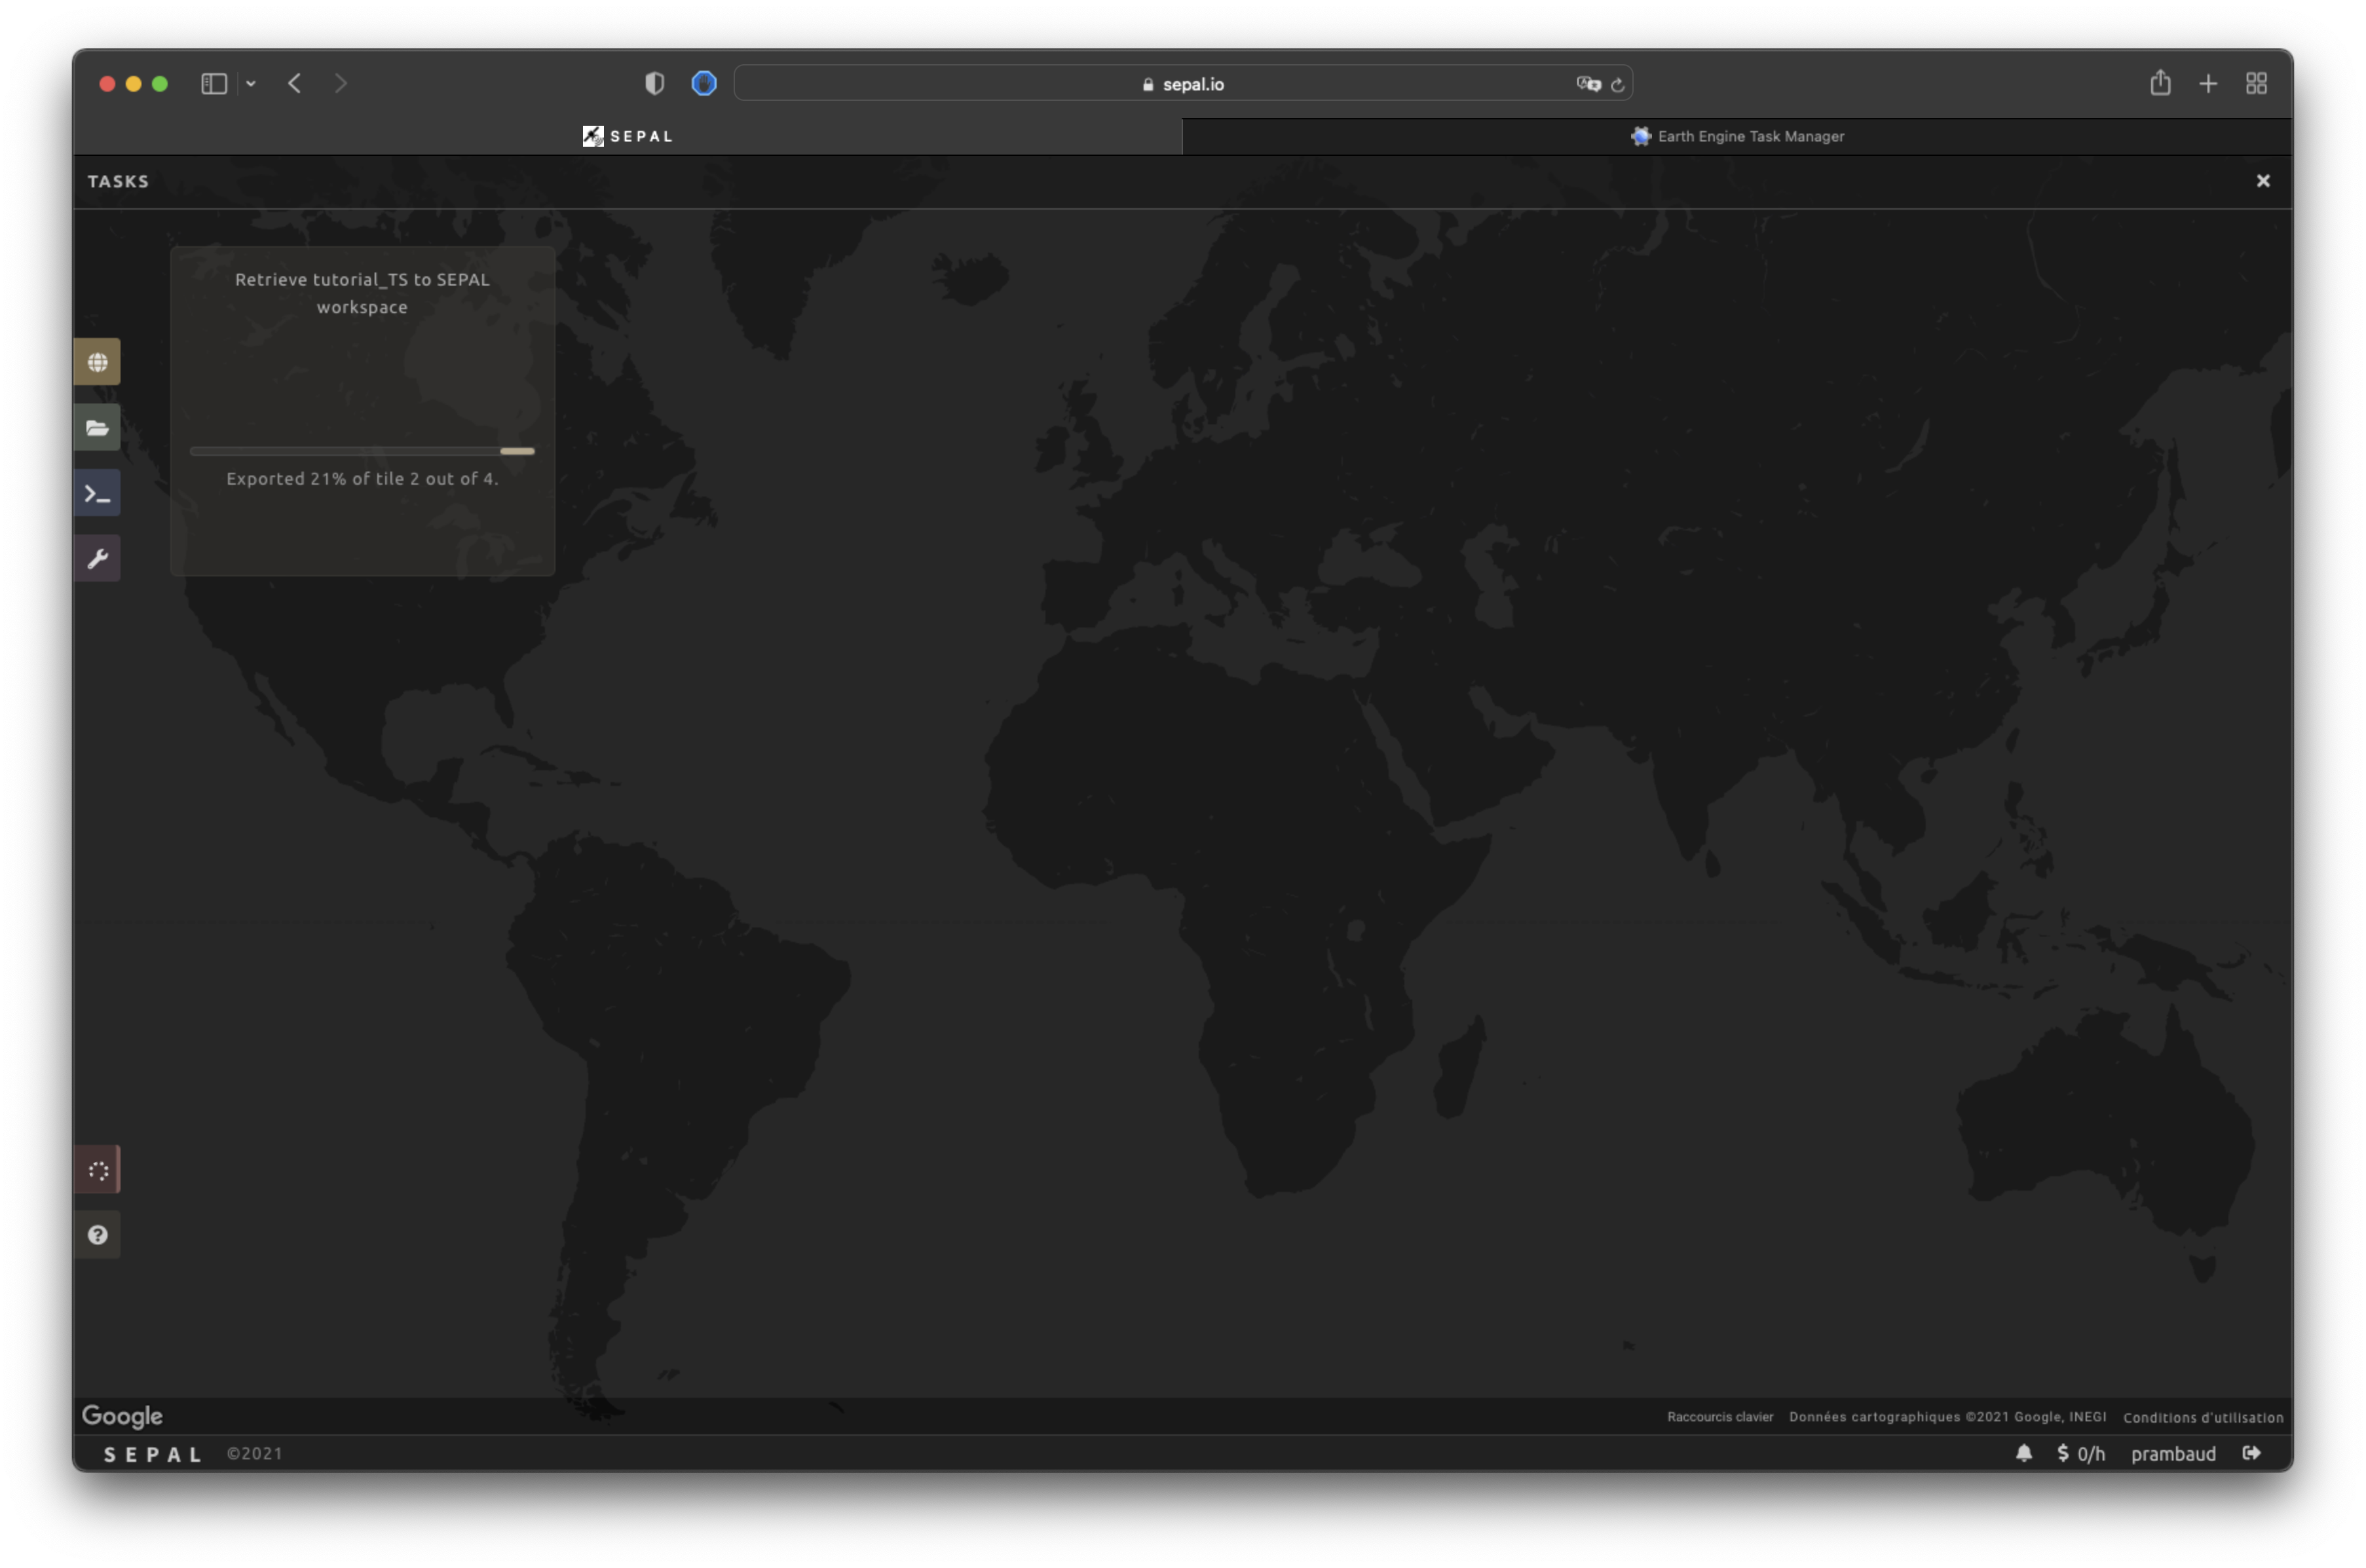
Exportation status#
In the Tasks tab (lower-left corner using the or buttons, depending on the loading status), you will see the list of different loading tasks. The interface will provide you with information about the task progress and display an error if the exportation has failed.
If you are unsatisfied with the way we present information, the task can also be monitored using the GEE task manager.
Tip
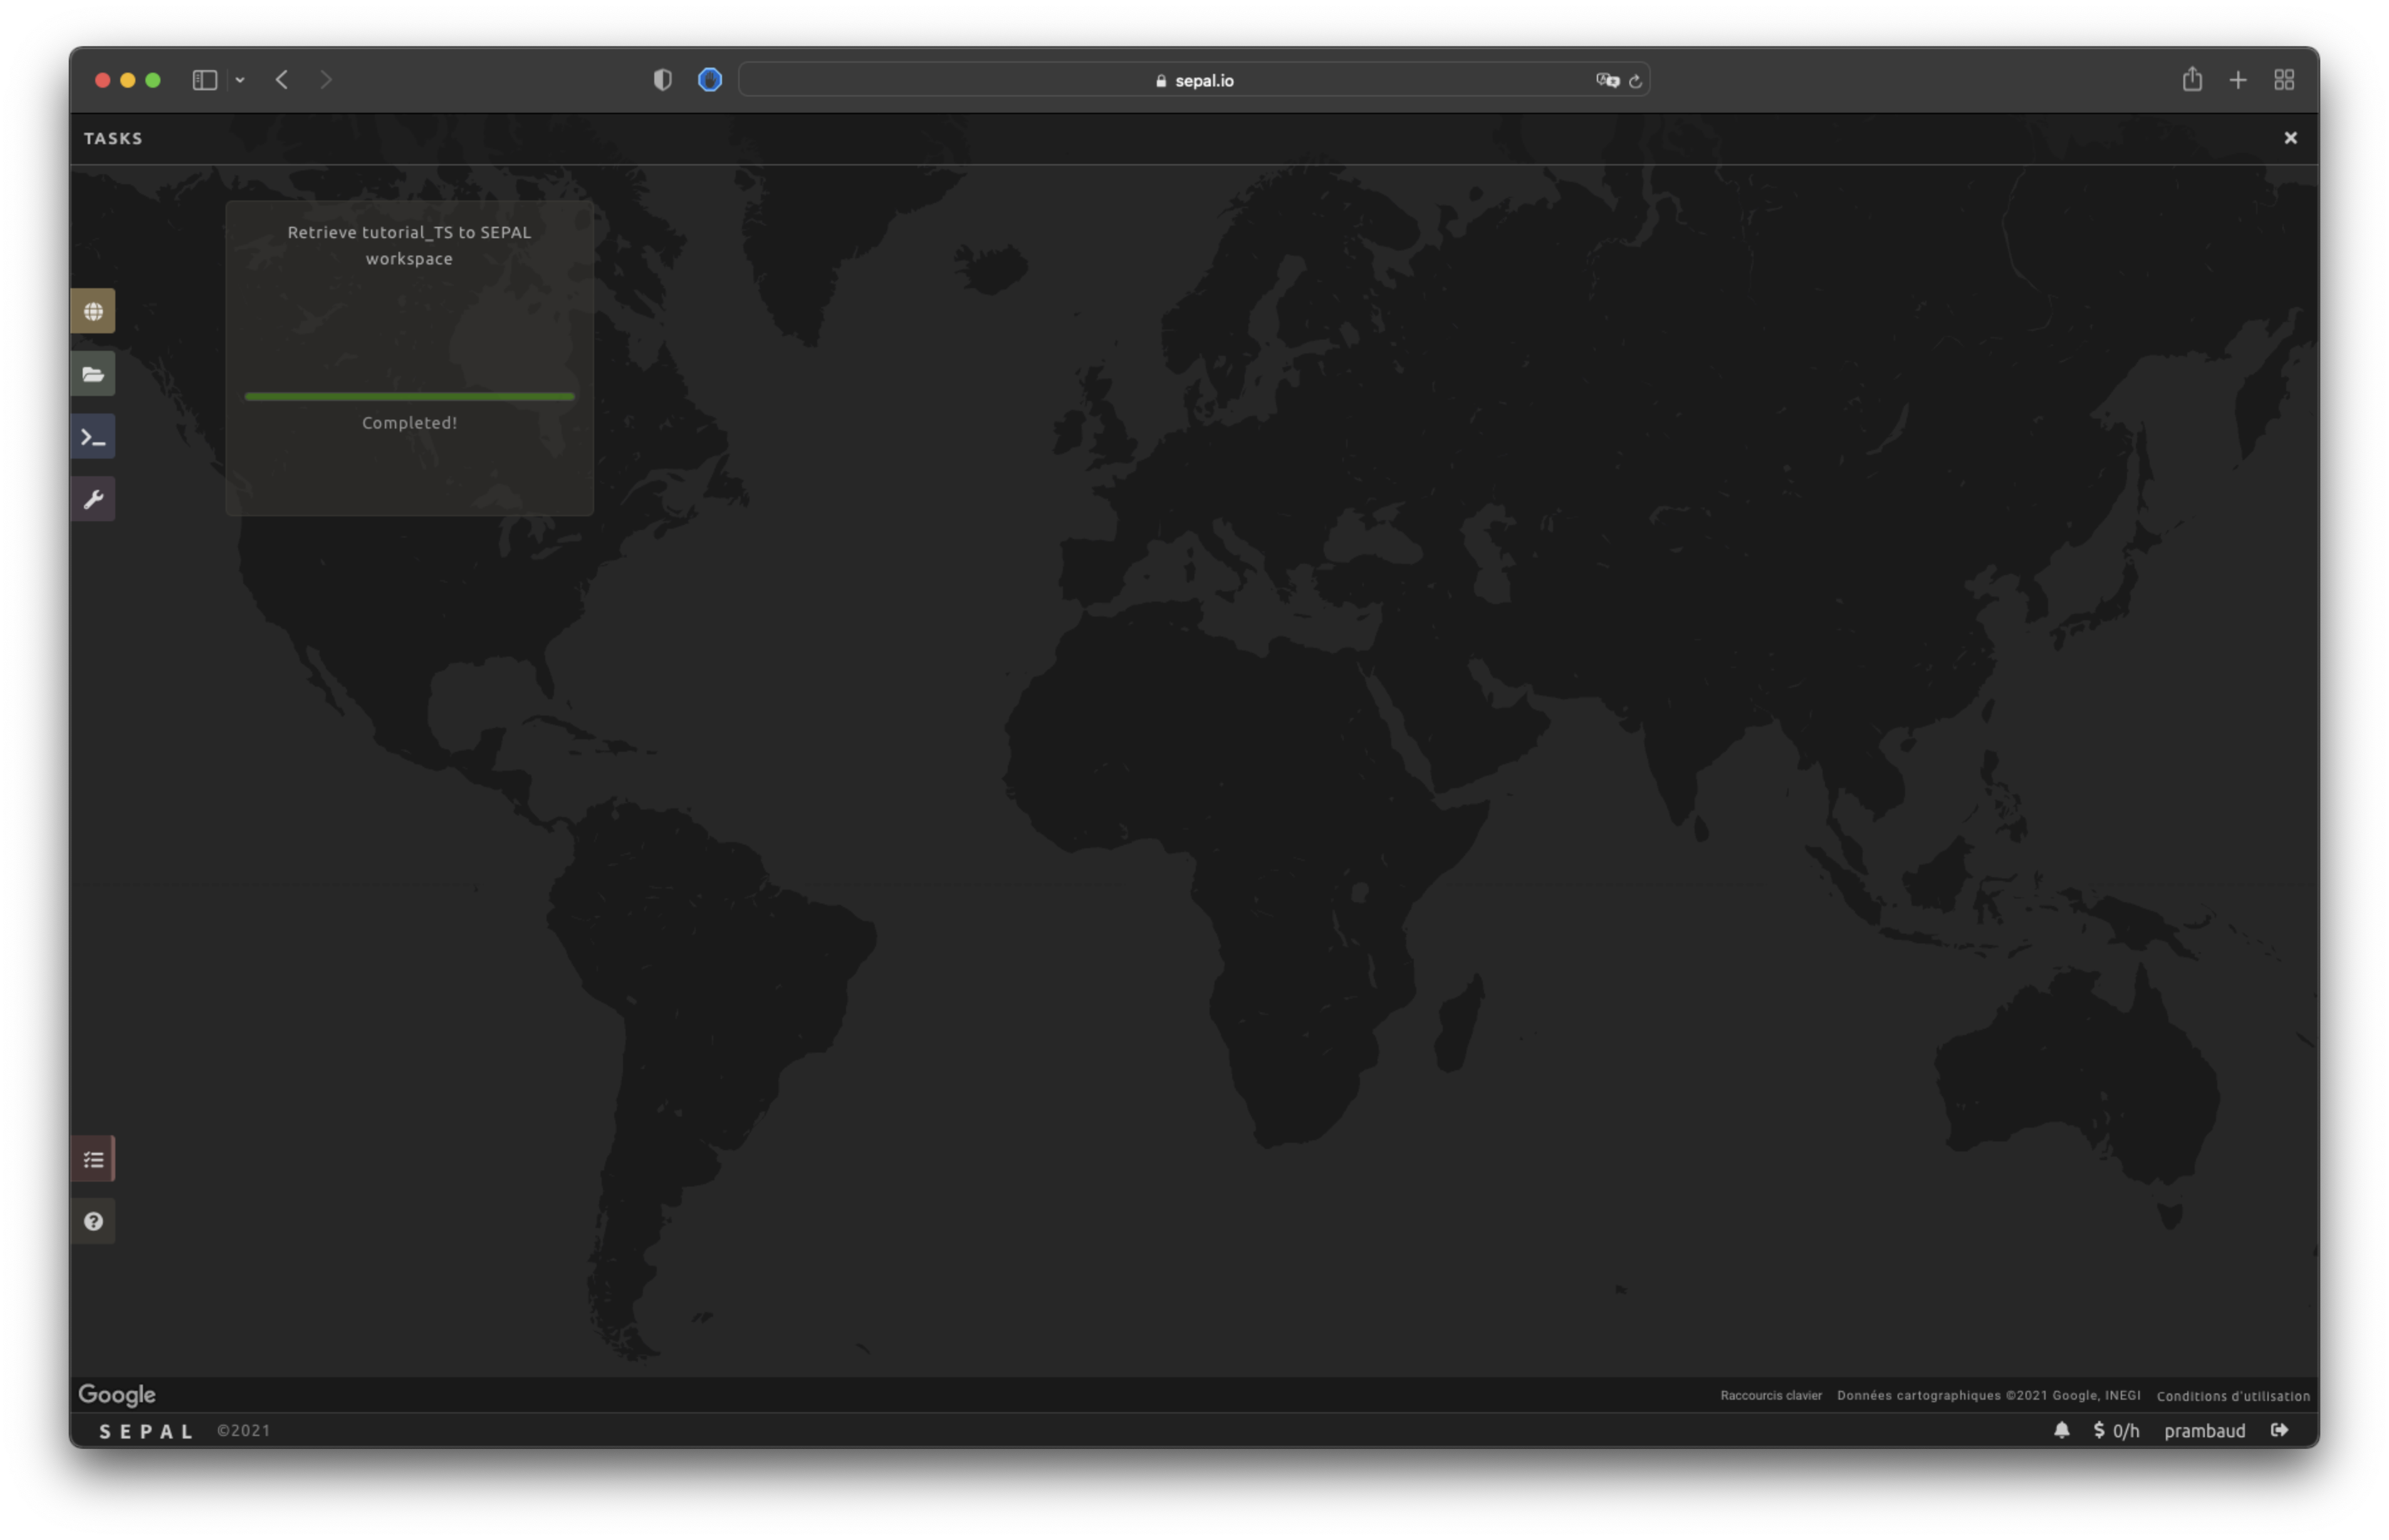
This operation is running in the background between GEE and SEPAL servers, so you can close the SEPAL page without stopping the process.
When the task is finished, the frame will be displayed in green (see the second image below).