CCDC slice#
Create CCDC slices out of CCDC assets
Background#
Powered by the application programming interface (API) of Google Earth Engine (GEE), SEPAL facilitates the workflow for applying the Continuous Change Detection and Classification (CCDC) approach, as proposed by Zhu and Woodcock (2014).
CCDC is a holistic methodological framework that encompasses various aspects of space-borne, multitemporal land mapping and monitoring using multitemporal satellite imagery. The core aspect of the method is a temporal segmentation algorithm applied at pixel-level.
Before creating a CCDC slice, a CCDC asset needs to be created (as described in CCDC asset creation). The asset holds all parameters that are needed to reproduce the modelled time series of the underlying data. As those parameters are stored at pixel-level, we retain the possibility to extract each pixel’s modelled reflectance at any given point in time, or for a timespan of the underlying time series (i.e. slicing).
In addition, we can access the parameters describing the model of the temporally intersecting segment. Those can be used as input features for subsequent classification tasks and generally improve class separability.
Getting started#
Create recipe#
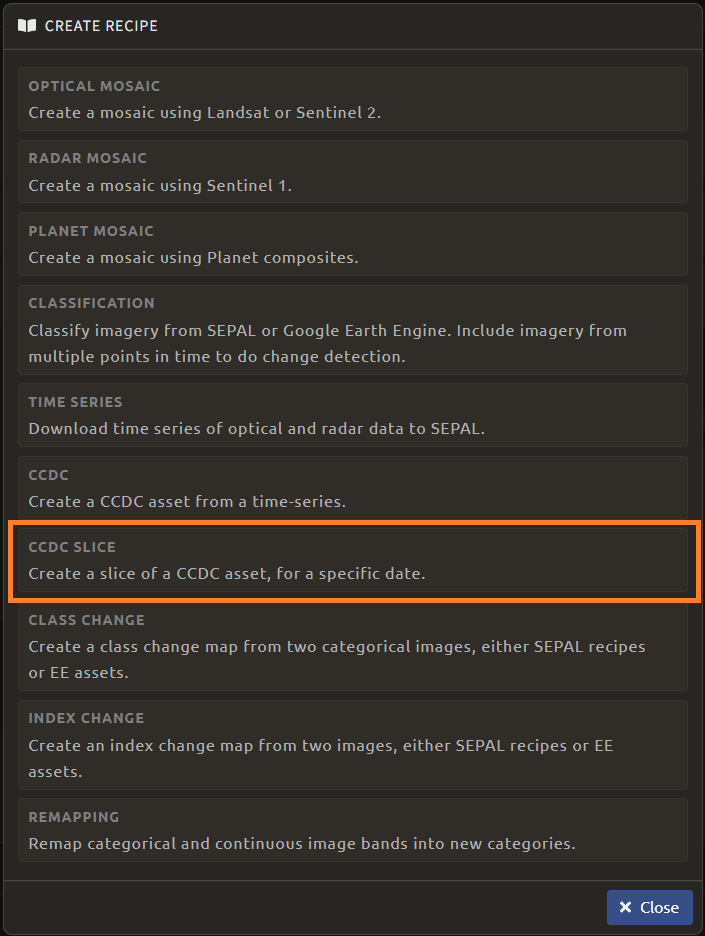
Once logged into the SEPAL interface, open the Recipe menu by selecting the orange button in the upper left of the SEPAL Start screen. Within the Recipe menu (see following figure), select CCDC slice, which opens a new Recipe tab.
Rename recipe#
The first step is to change the name of the recipe by double-clicking on the tab at the top of the map. This will automatically save your recipe and make it visible in the list of created recipes. Furthermore, the given name will be used for exported files, both locally and on GEE. We suggest using the following convention: CCDC-slice_<aoi>_<sensor(s)>_<date>.


Parameter selection#
The following steps describe parameter selection, which can be found in the lower right of the screen.
The buttons open the following dialogues:
SRC: Selection of CCDC asset source
DAT: Date or date range selection
OPT: CCDC slicing parameters
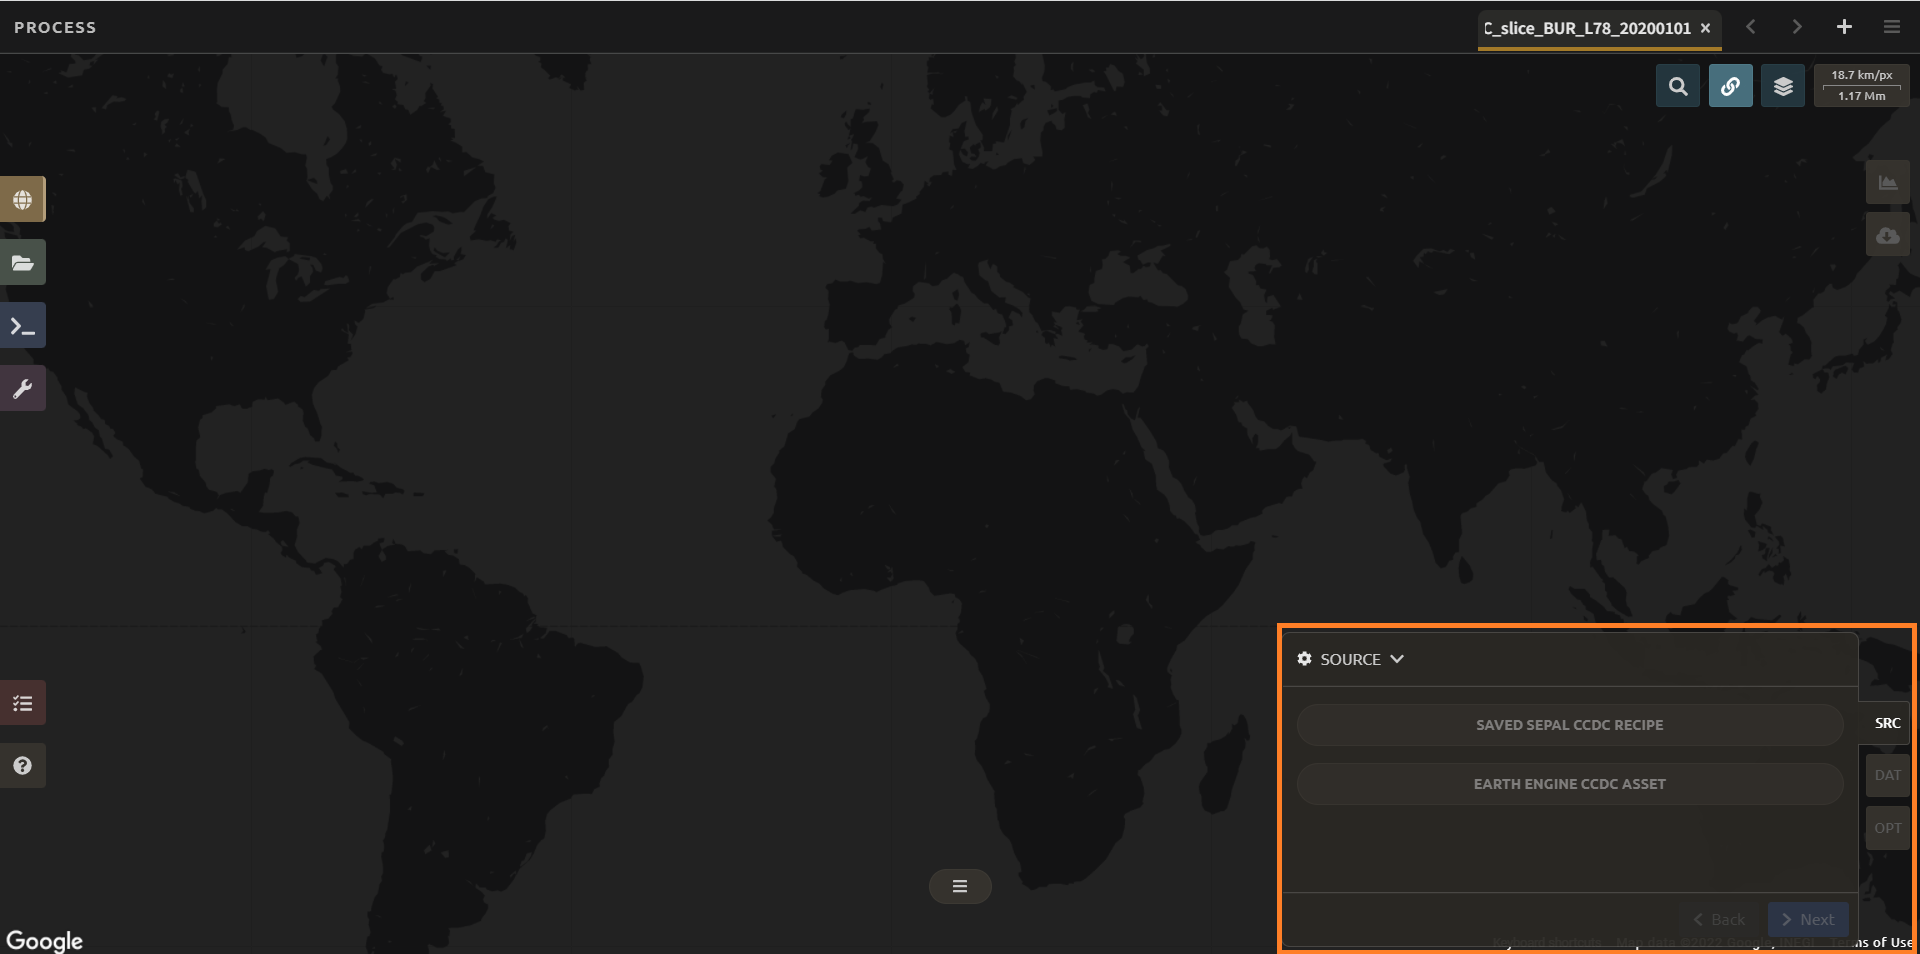
Selection of CCDC asset source#
CCDC slices are created out of CCDC assets. Here you have the choice to select the base asset that will be used to generate the slice.
Two options are provided:
Option 1 is to directly point to an existing SEPAL recipe. Note that in this case, the CCDC asset needs to be regenerated on the fly based on the parameter settings of the CCDC asset. In most cases, this is computationally demanding and may lead to timeout errors. Therefore, it is recommended to opt for Option 2.
Option 2 is where an existing CCDC asset is selected from GEE. In this case, the CCDC asset needs to be exported first, so you can point to its location within GEE directly. This usually allows for instant visualization, as the slicing procedure does not require much computing power.
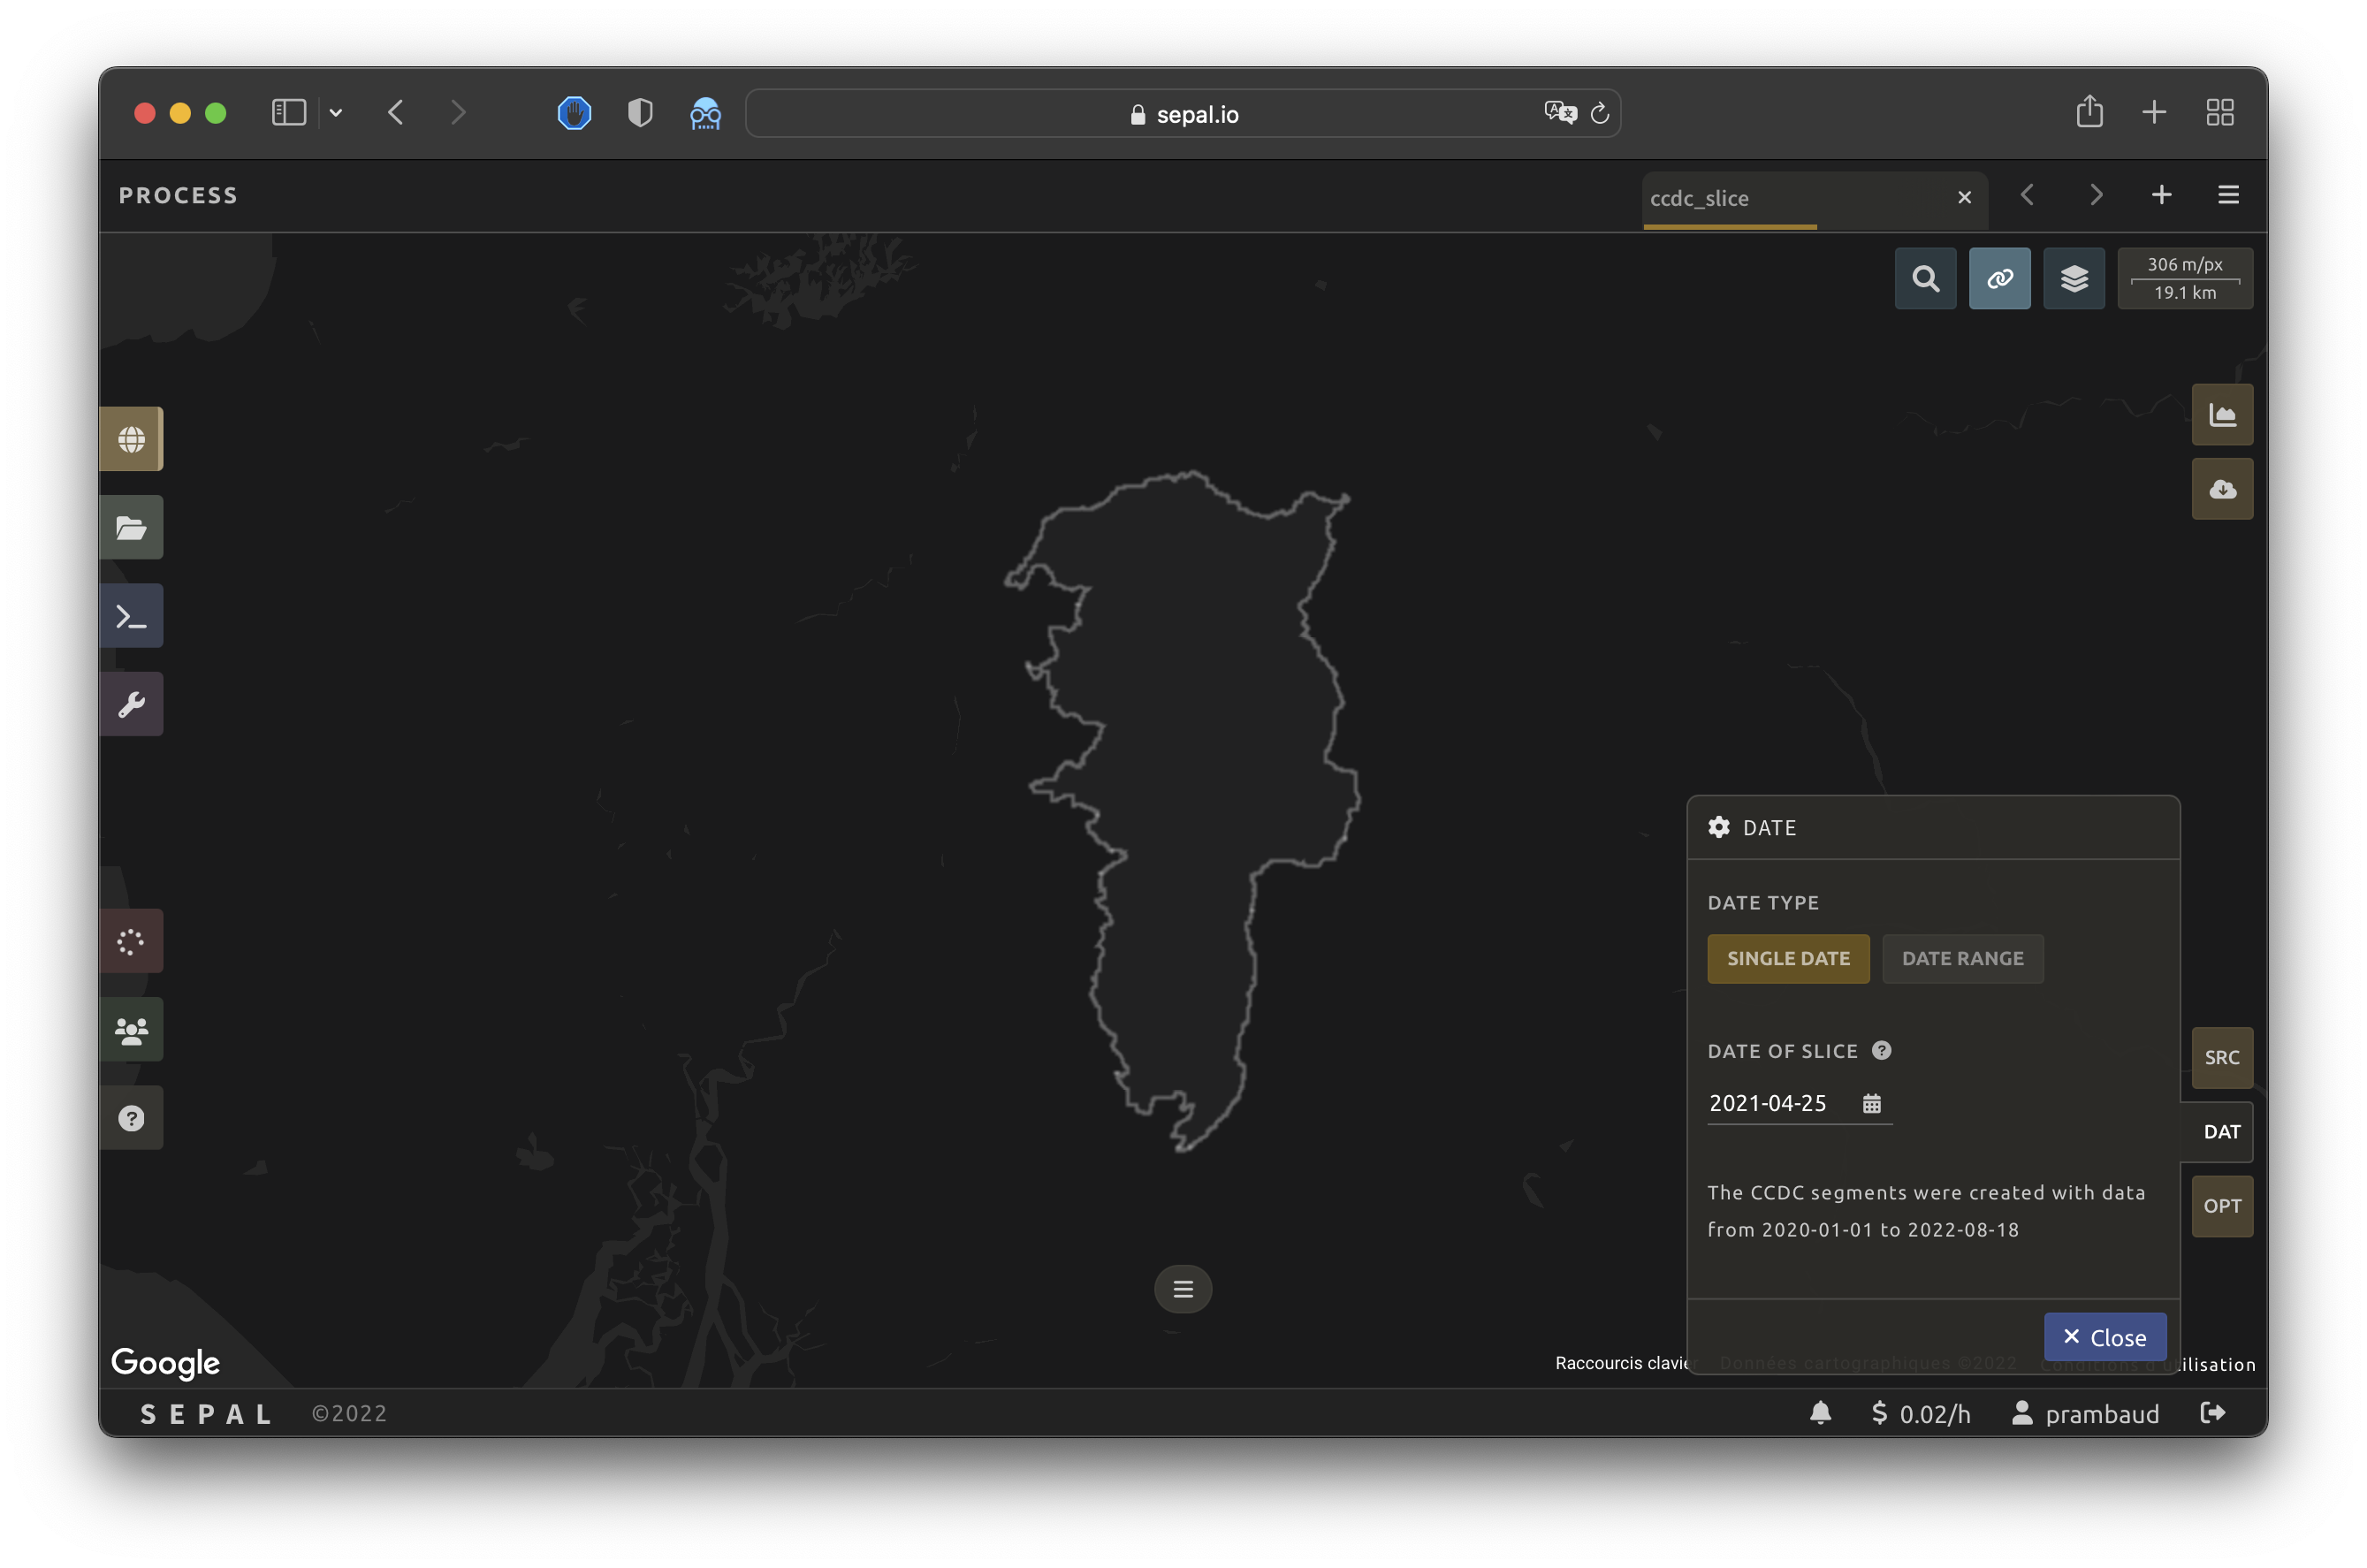
Date (range) selection#
As described above, the slicing procedure cuts out the model parameters of a specific date in order to generate the expected reflectance at that given point in time. This can be either a concrete date single date, or a date range date range. For the latter, the median value of the selected time period over the modelled time series is calculated.
In addition, it is possible to display the detected breaks for the intersecting temporal segments. Note that for date ranges, more than one break can fall within the specific time-period. This needs to be considered in the next parameter setting: the CCDC slicing parameters.
CCDC slicing parameters#
Specific date#
In case a single date has been selected, the Slicing parameters will appear, as shown in the following figure.

The first parameter is the number of Harmonics used to extract the modelled reflectance at the given point in time. Three harmonic terms are set by default. Lowering this number will result in a smooth time series that does not depict intra-annual periodicity. Setting this value to 1 will only capture the inter-annual periodicity (i.e. annual seasonality), while a value of 0 results in the mean value over the segment’s time period.
The Gap strategy relates to the presence of gaps between two temporal segments (i.e. the presence of a break). After a detected break, CCDC reinitializes a new model (i.e. new segment) only after a couple of observations. In between, no model is available from which to extract the data. In order to avoid masked pixels, the user has the possibility to:
Interpolate: Use a temporally weighted mean between the previous and subsequent model for the given data.
Extrapolate: Use the extrapolated value of the closest, previous or next model for the given data.
Mask: Mask the value as No data.
In case of extrapolation, the additional option, Segment to extrapolate, allows you to choose either the model parameters from the previous, next or closest segment with respect to the selected data. Furthermore, the Max days to extrapolate setting allows you to limit the number of days until this procedure is considered valid. If the difference between the selected date and the segment’s valid time period is greater than this threshold value, the pixel will be automatically masked.
Date range#
In case a date range has been selected, the Slicing parameters will appear as seen in the figure below.

The first parameter is the number of Harmonics used to extract the modelled reflectance at the given point in time. Three harmonic terms are set by default. Lowering this number will result in a smooth time series that does not depict intra-annual periodicity. Setting this value to 1 will only capture the inter-annual periodicity (i.e. annual seasonality), while a value of 0 results in the mean value over the segment’s time period.
Then, select the Break analysis band. As the slice includes a range of observation, the model can include multiple segments and thus multiple breaks. This parameter will select the band used by SEPAL to select the break that will be kept in the slice output.
Breaks identified by the CCDC asset at the end of the time period are usually errors. If your slicing ends at the same date as your CCDC asset, you should consider masking the end break.
SEPAL offers four ways of selecting the remaining break:
First: The first break within the Slice date range.
Last: The last break within the Slice date range.
Magnitude: The break with the highest magnitude of change.
Confidence: The break with the highest confidence value (for more information about confidence computation, see CCDC asset creation).
By selecting a specific break direction, the break selection will only take into account the break with a decrease or increase magnitude. By default, we consider Any break direction.
By moving the slider, you will ignore the break with a low confidence from the analysis. You can exclude a break up to 50 percent. If no break respects the requested confidence, the highest available will be selected.
Visualization#
Select the button to start the plotting tool (1).
Move the pointer to the main map; the pointer will be transformed into .
Click anywhere in the AOI to plot data for this specific location in the pop-up window that appears.
The plotting area (3) is the same as the one presented in the CCDC recipe with small adjustments to the slicing operation. Refer to CCDC asset creation for a complete description.
The plotting area covers all of the CCDC asset range (4); the user will see the slice in red (it will be a sector of the plot if a date range is selected and a red line if a single date is selected).
Attention
The plot feature is retrieving information from GEE on the fly and serving it in an interactive window. This operation can take time, depending on the number of available observations and the complexity of the selected pre-processing parameters. If the pop-up window displays a spinning wheel, wait up to two minutes to see the data displayed.
Export#
Important
You cannot export a recipe as an asset or a .tiff file without a small computation quota (if you are a new user, see Manage your resources).
Trigger the export task#
Select the button to open the export dialogue. Here you can select the bands to retrieve and the scale at which you would like to save the slice. CCDC slices can be both exported to GEE and your SEPAL workspace.
You can export this asset as a .tif image to your SEPAL workspace or as an image in GEE.
The scale parameter depends on the data selected and the level of detail you will need for further analysis. Landsat-based assets are usually created at 30 m. Sentinel-1 and Sentinel-2 can be at 10 m, but will need nine times more space as compared to 30 m resolution.
Bands#
In the CCDC slice exportation, you can select any band that was available in the initial CCDC asset. The result will be the evaluated values of the model at the slice date for a single date and the mean value for a date range.
Band type#
For each selected band, the user can select which output from the model to export. For displaying, the value is sufficient, but for another analysis like classification, it’s very important to add information relative to the model itself (amplitude, error, phase) to increase the quality of the output information.
Segment bands#
Users can also export the specific Segment bands. These bands are relative to the segment intercepted by the slice (if the slice is in a break, the previous segment is selected). This is where you’ll find the dates of the breaks and information about confidence, number of observations, etc.

Exportation status#
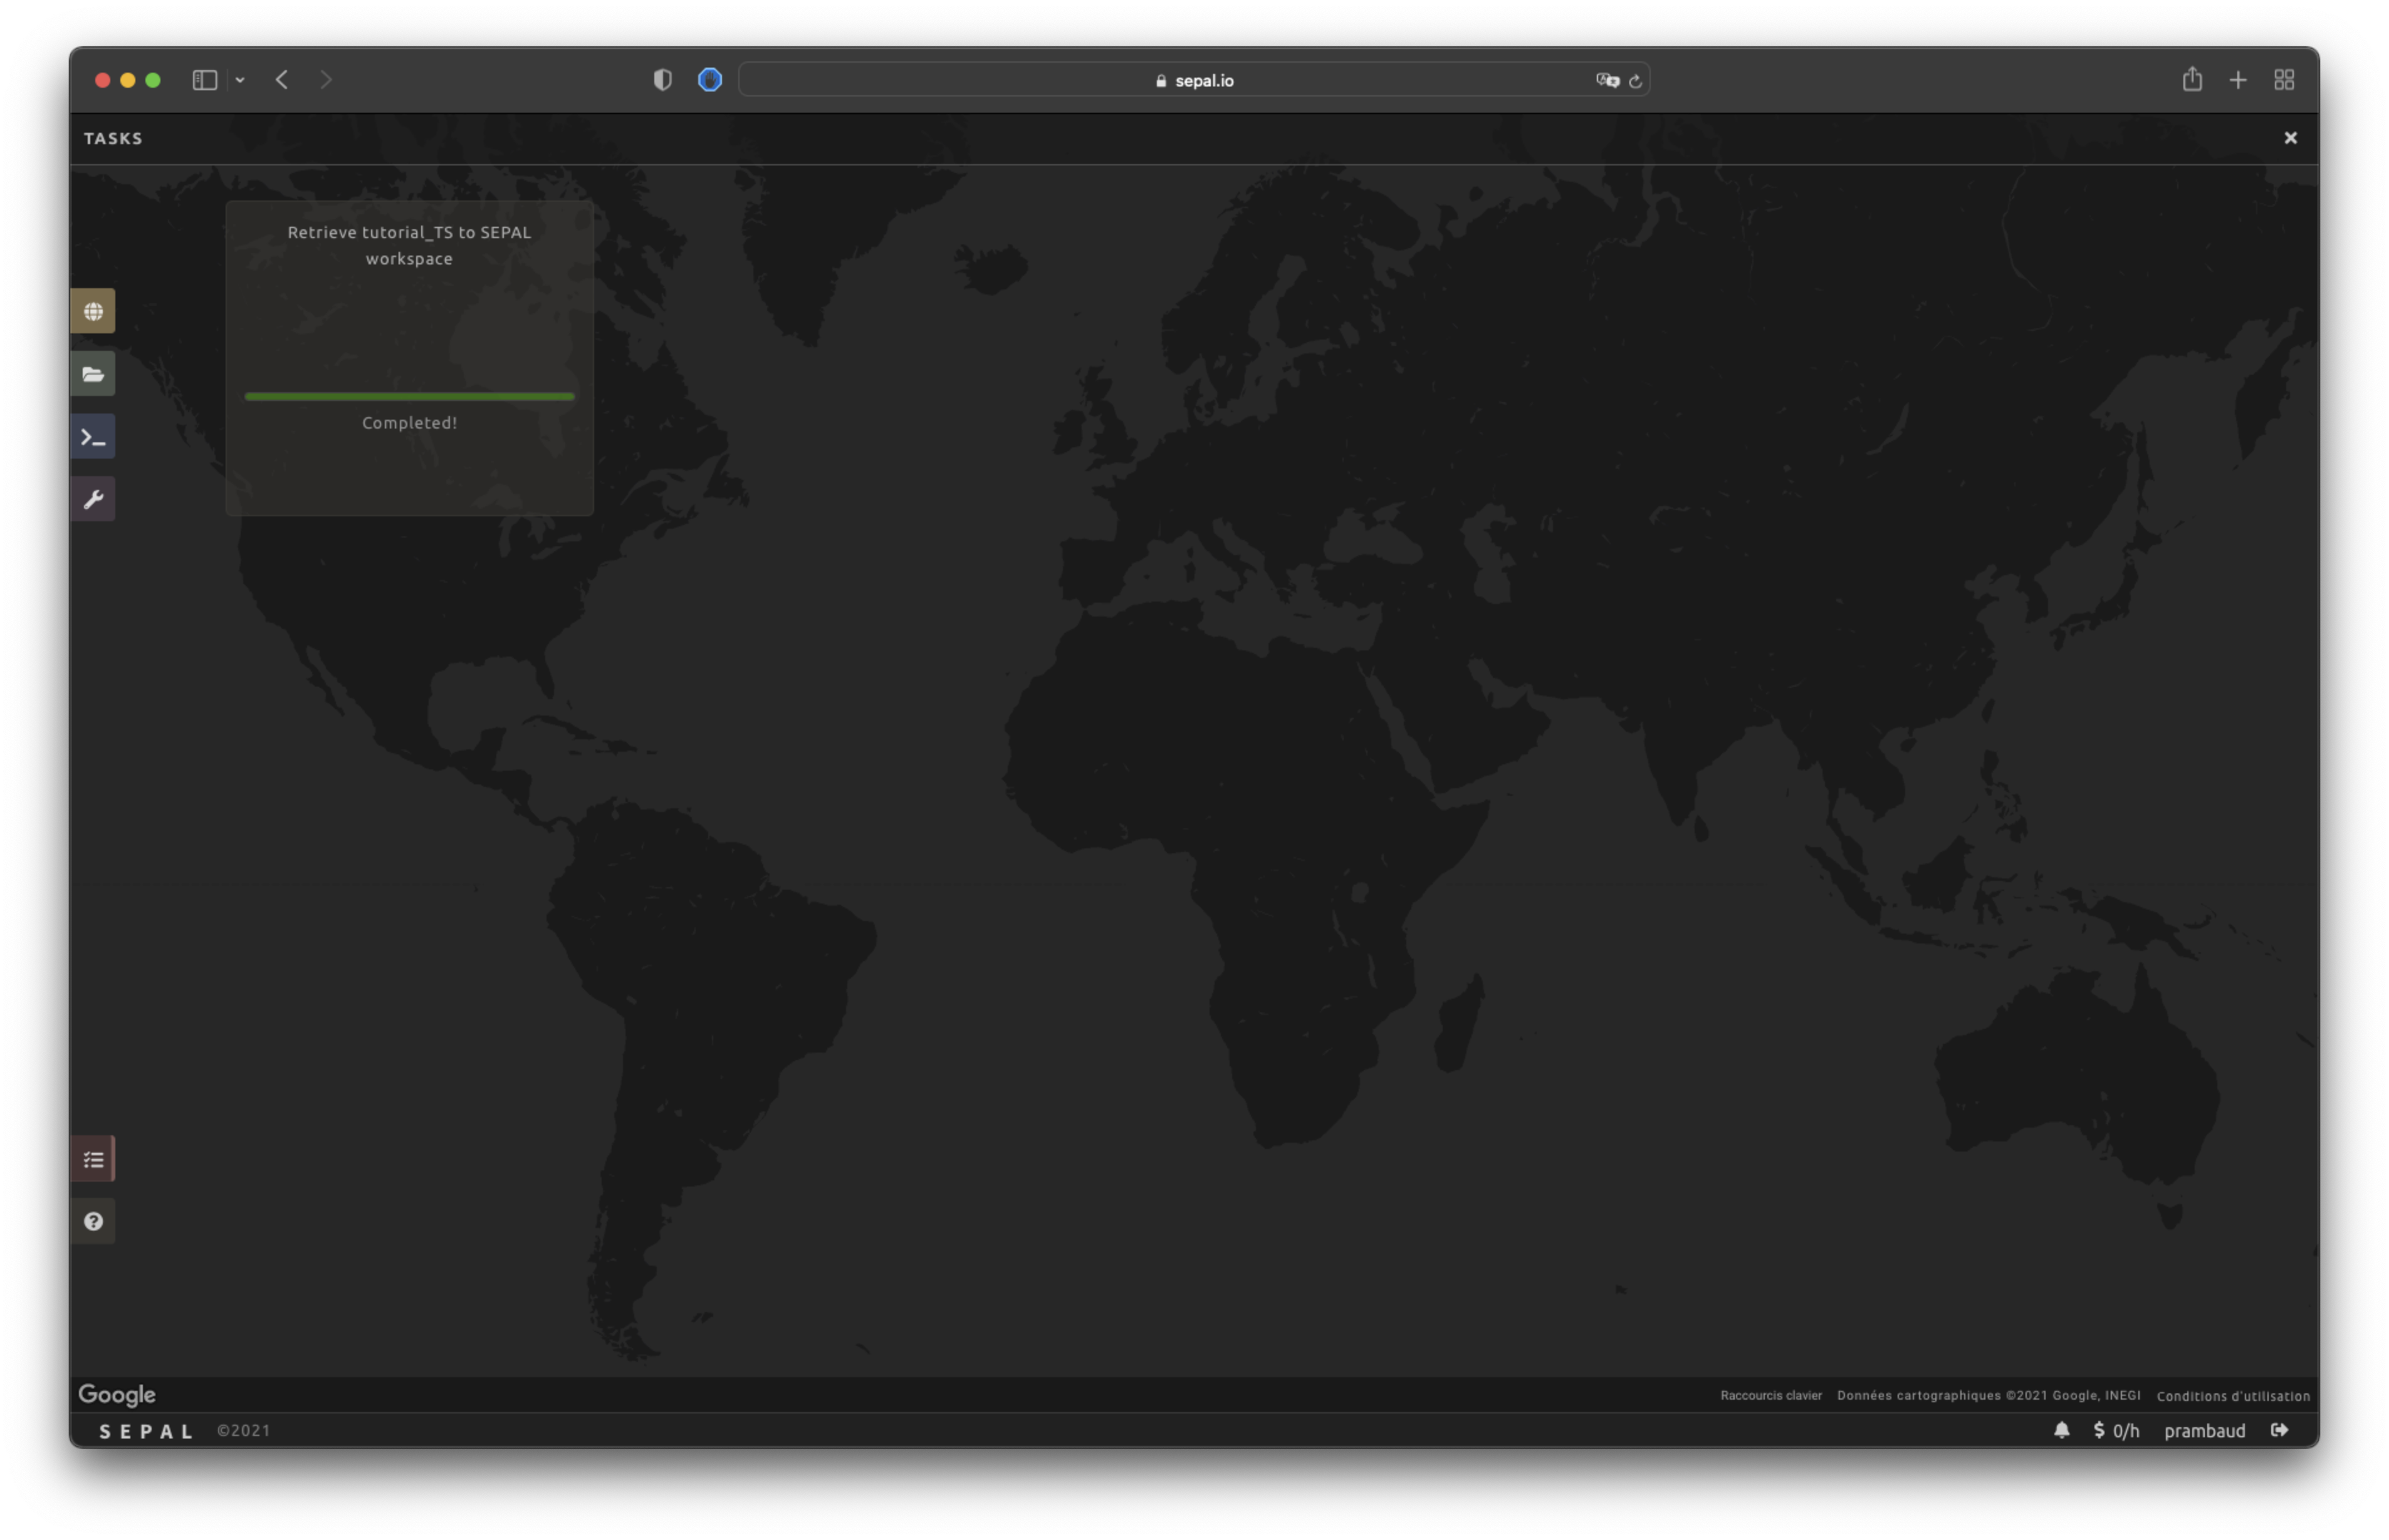
In the Task tab (lower-left corner using the or buttons, depending on the loading status), you will see the list of different loading tasks. The interface will provide you with information about the task progress and it will display an error if the exportation has failed.
If you are unsatisfied with the way we present information, the task can also be monitored using the GEE task manager.
Note
Since this operation is running between GEE and SEPAL servers in the background, you can close the SEPAL page without stopping the process.
When the task is finished, the frame will be displayed in green (see second image below).